Zyliss Pizza Wheel Cutter

Zyliss Pizza Cutter

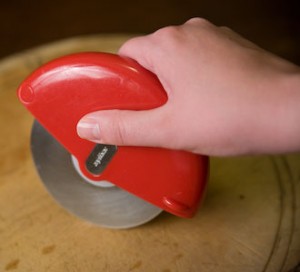
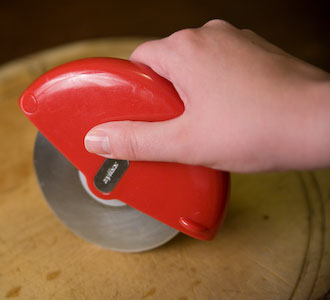
There’s a few different methods of cutting pizza, with the pizza wheel being the most traditional. Wheel cutters are suitable for most pizzas, with the exception perhaps of pizzas with toppings that can easily be disturbed – things like whole prawns and so on. For those pizzas I use scissors or a single rocker blade style cutter, but for everything else I use a Zyliss cutter, one of the best pizza cutters I have used!

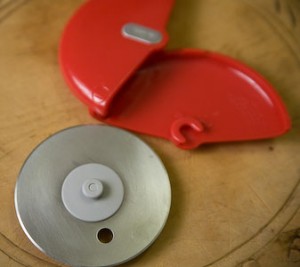
You can see the difference between this and a more traditional wheel cutter – the large handle lets you get a really good grip, and because the blade is supported on both sides it feels more sturdy that the old fashioned cutters.

To clean, the plastic part is hinged on one corner, so the blade can be removed. It seems to be dishwasher safe after many cycles, which is a bonus if you eat pizza often (I do).

zyliss pizza cutter
Ready For Cleaning

I use a diamond stone to sharpen the wheel, but I have to say it’s trickier than sharpening a knife (as are all pizza wheel cutters). More to come on that as I figure out the best technique. To be honest, it might be easier to just buy a new wheel every year or two!

You can buy the  Zyliss cutter here for around $10. If you try them, let me know what you think.

Zyliss Pizza Cutter
My Battle Scarred Zyliss Pizza Cutter

Bacon and Egg Breakfast Pizza

A bacon and egg pizza has been on my mind for a while now, so with a cool sunny morning on the weekend it seemed like the perfect time to do some morning baking in the wood oven! This is the first breakfast pizza recipe I’ve put together and while it wasn’t an unqualified success it was quite delicious, and I’m going to enjoy tweaking the recipe.

A note on ingredients – most commercial bacon is made by injecting pork with a solution of brine and phosphates so that it retains water and weighs more when it’s sold. They use liquid smoke and other additives for flavouring. While any bacon can taste good, I prefer to buy bacon from smaller producers who care about the quality of their products and minimise the chemicals they use. If you can find such a producer at a farmers market or specialty store, or even direct from the farm, stock up – the taste of traditionally cured and smoked bacon is worth the hunt!

You could vary the ingredients to include other breakfast favourites but I chose to keep it simple with onion adding some crunch and tomatoes contributing acidity and richness that goes well with smoky bacon. I chose to dice rather than slice the onions, to give a layer of texture underneath the bacon. Tearing the bacon adds to the presentation a little and makes for more interesting, varied mouthfuls.

This recipe allows for topping 2 small or one very large pizza.

Bacon and Egg Pizza

  • 1/2 a Brown Onion, diced finely
  • 1 ripe Tomato, coarsely diced
  • 3 Rashers of bacon, torn into manageable pieces
  • Fresh herbs to garnish
  • 4-6 Free range eggs
  • Pizza sauce
  • Mozzarella
  • 1 Quantity dough of choice
  • Olive oil
  • Salt & Pepper
Tearing off crust to dip in the egg yolk was delicious!

Shape the base, and place on a floured peel. In a bowl, sprinkle the tomato with a little salt. Place the pieces in a sieve and allow to drain. This will remove some moisture from the tomatoes and give them a little flavour kick as well. Drizzle olive oil over the base, then add tomato sauce followed by a thin scattering of mozarella.

Scatter the onion and tomato over the base. Add a little more cheese, then the bacon pieces.

At this point you need to make a decision about when to add the eggs, based on how well you want them done. I cooke my pizza in a wood fired oven for a minute before I poured on the eggs. This resulted in quite a runny yolk which was great to dip pieces of the crust into. If you are cooking in an indoors oven with a pizza stone, allow a few minutes for the eggs to cook to runny or put them on at the start if you like well done.

When adding eggs, you can choose to beat them in advance or pour them on whole. Whichever approach you take, have all of your eggs cracked and ready so you can get them on quickly and the pizza back in the oven. If using whole eggs, think about the position so that you can give guests an egg on every slice. The next improvement I will be making to this recipe will be to use large egg rings on the pizza – it is quite hard to get them to land where you want! I think egg rings will allow a little white to leak out around the edges and look nice, but hold the eggs roughly where I want them.

Once cooked, scatter with some fresh herbs. It’s hard to go past parsley for a classic egg pairing; I used basil from my garden as well. A final note – you could easily make mini pizzas following this approach, and I bet kids would love having their own breakfast pizza with an egg in the middle!

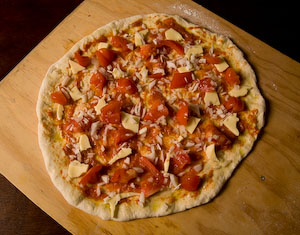
As always, don't overdo the toppings - leave room for the crust to breathe. This is before adding the bacon.
Enjoy! Yes, I burnt the crust... just a little.

American Pie – by Peter Reinhart

I’m an avid cookbook collector, but I always gravitate towards books that are more than just collections of recipes, preferring to learn more about the background and general techniques involved in the topic than just cook blindly from a list. For these reasons, I grabbed Peter Reinharts pizza recipe cookbook American Pie as soon as I heard about it!

This book has been out for a few years now, but is well worth tracking down.

American Pie is subtitled “my search for the perfect pizza”, and true to the name the first part of the book tracks Peter’s travels around the world, hunting down great pizza at some well known international destinations. I enjoyed reading about the different pizza styles and toppings in different cities and continents, but if I have one criticism of the book it is that as travel writing, it is a little ‘tame’. Not many great adventures, but I guess that’s not really the point. Many American locations are also featured, with some great descriptions of well known pizza joints like Pizzeria Bianco and their techniques.

The second section of the book is where it gets good though. Peter dedicates nearly 40 pages to different dough styles alone, including many of the recipes described in the first section of the book. This focus on dough is in line with Peter’s statement that for him, a good crust is 80% of the enjoyment of a pizza. For me, it might be a little less than 80% but it’s certainly the most important factor! Delayed fermentation doughs are introduced together with standard enriched doughs, thick and thin crust, and so on. A good recipe for sourdough pizza dough is included, with instructions on raising and maintaining a sourdough starter from scratch.

Following the dough recipes, there is a good range of sauces and other toppings like pesto, flavored oils, purees and so on. The sweet and sour onion marmalade sounded good to me but my first attempt was a mess!

Rounding out the latter section of the book is a large collection of pizza recipes, with most of the recipes from the earlier travel section of the book recreated.
American Pie is available on Amazon for under $20.

You Need A Tomato Press

Our family has been growing a large patch of tomatoes for a few years now, and bottling our own tomato sauce for pizza sauce, pasta, and everything else. When you are processing a large quantity of tomatoes you quickly realise that pressig them through a sieve, or even using a food mill, is going to take an awful long time.

We got around this problem by ‘borrowing’ a tomato press from a relly – I say ‘borrow’ because they haven’t asked for it back yet, and it’s far too useful to get rid of it unless we have to!

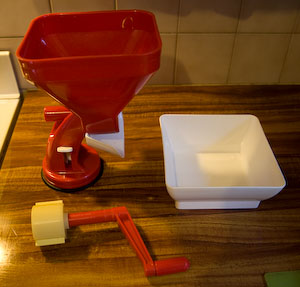
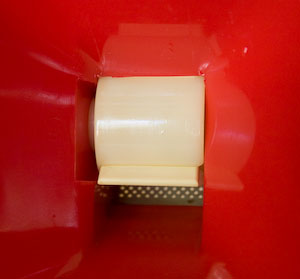
This machine is a pretty simple design, consisting of a large suction cap mounted base (very useful, pasta machine manufacturers please take note) with a funnel for the tomatoes, a tray to catch the pulp, and a spring loaded handle.

It all hinges on the white part of the handle that you can see, which sits under the funnel. There are two small spring loaded paddles protruding from the side, and these press the tomatoes against a wire screen which is just fine enough that seeds and skin slide past while the pulp and juice pass through. Here’s the tomato mill in all it’s glory (excuse the photo) together with a shot of the inside with the handle/scraper mounted:

To start processing tomatoes, you just briefly simmer them in boiling water to loosen the skins, and start dropping them into the funnel. It’s not a bad idea to cut larger tomatoes in half once they have been simmered, but mind your fingers – they are hot. Alternatively, squish them down into the machine with the handle of a wooden spoon as you go. A word of warning – remove any protruding stems as they will block the machine up.

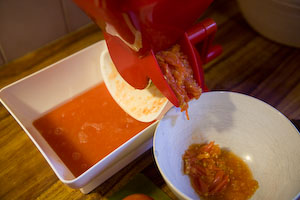
Here’s the tomato strainer in action, you can see a bunch of skins being pushed out the side and lovely tomato sauce being produced. Don’t throw the skins out straight away though – I have found a good quantity of extra tomato pulp can be produced by running the skins through the machine a second or even third time. My one criticism, at least with the machine we have, there is a bowl supplied to catch the pulp but nothing to catch the skins. You can manage with any bowl though.

When you are finished, the whole thing comes apart neatly to clean up (and it will be messy). Make sure to pull apart the I-shaped plastic blades, as sauce gathers in between them.

The good news is that a tomato machine like this one can be found cheaply online, Amazon have the exact model here for under $50 last time I checked. I highly recommend a similar version if you’re planning on processing any amount of tomatoes.

Fresh Tomato Pizza Sauce

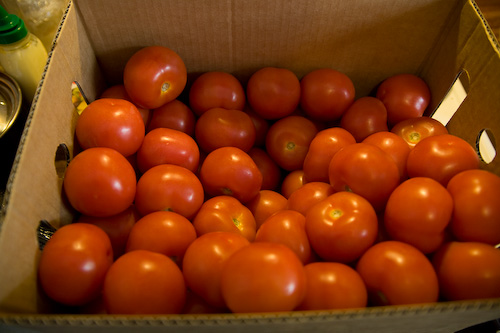
When tomatoes are in season it’s nice to make a pizza sauce with good, ripe freshly picked ones. There’s maybe less of the rich cooked tomato flavour  in the sauce, but more fresh, zingy flavour.  I like to use fresh herbs in fresh tomato sauce – thyme in particular.

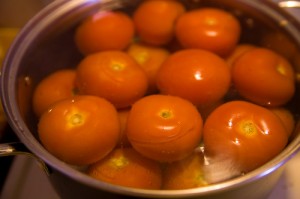
Bring a large pot of water to the boil. Drop in a few tomatoes at a time and cook until the skins start to crack, or feel loose when prodded with a spatula. Remove the tomatoes to a strainer and repeat until all tomatoes are cooked.

Simmered tomatoes, ready to be pulped

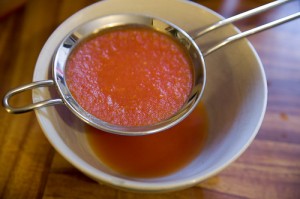
I use a tomato mill as detailed here to remove the seeds and skins. A mouli/food mill can also be used. If none of these tools are available just peel the skins off by hand and mash or blend the tomatoes. The sauce at this point tastes amazing (if you made lots, try splashing a little onto some spaghetti for a snack!) but it might be too runny to use for pizza sauce. It can be thickened either by simmering over medium heat until thick or just straining the pulp through a sieve, which works surprisingly well! If you sieve the pulp, save the runny juice for soups or something.

Separating the tomato pulp from the juice


Add fresh herbs and a little salt to taste before using on pizza. This sauce can also be preserved in jars or bottles.


Leek, Tomato and Mushroom with Stracchino

I cooked a bit of an unusual pizza recently on a whim, and it turned out pretty well! I was inspired by a new (to me) cheese that I found at the markets. It’s called Stracchino, and is a soft cows milk cheese. It has a lovely delicate flavour with a hint of sweetness combined with a  little tangy-ness. It melts amazingly, turning into a soft, sticky and creamy puddle.

I wanted to match this up with some ingredients that would complement the sweet cheese as well as something to contrast with the sweet flavours. This is what I came up with. The sweetness of cooked leeks is nice with this cheese and the contrasting texture of slightly crunchy/slippery leek with the smooth melted Stracchino worked well. Pieces of tomato and mushroom are little bursts of intense flavour to contrast with the smooth sweetness of the cheese and leek.

Ingredients

  • Pizza dough (I made one massive pizza with a 500g dough ball, you could also make 2 smaller ones with these quantities of toppings)
  • Pizza sauce
  • 2 Leeks
  • Good handful of button Swiss brown mushrooms
  • 2 Ripe tomatoes, diced
  • Paprika
  • 300g or so Stracchino. You could use mozzarella if you absolutely can’t find this, it will still work well with these toppings

Method

  1. Cut the green tops off the leeks and discard. Wash the leeks well. Dice and saute in olive oil with one crushed clove of garlic until translucent.
  2. Tip the mushrooms into a hot pan, and leave them to cook until starting to brown, shaking to stop them burning.
  3. Shape your pizza base and spread with a thin layer of sauce.
  4. Scatter a few pinches of paprika over the tomato sauce. It’s amazing how much of a difference there is between a good quality paprika versus the ones I have tried from supermarkets!
  5. Scatter the leek mixture evenly over the base.
  6. Slice the cheese and tear each slice into chunks.  Scatter evenly over the pizza. Make sure to leave some gaps so that the crust doesn’t get too moist.
  7. Now scatter over the mushrooms and diced tomatoes. Don’t overdo it – a good guide is to end up with around 2 pieces of each per slice, on average.
  8. Cook on a preheated pizza stone or any other cooking method of your choice.

How to cook wood fired oven style pizza in your home oven in 20 minutes

Last night I planned to fire up the wood fired oven for a pizza party. I had my dough balls and ingredients ready and laid out, and even made a new peel for the occasion! The only problem was that when it came time to cook pizzas, my oven was too wet from all of the rain we’ve been having (I should really stop procrastinating and render the oven so that it doesn’t get waterlogged in the rain, but that’s another story).

Wondering how I could feed the hungry hordes without even having a pizza stone preheated in my inside oven, I remembered something else I read on the net a while back and thought I’d give it a try. It worked so well that I wanted to share it so that you too can have a backup plan if you need to cook some emergency pizzas one day!

You will need

  • Pizza dough, sauce, other toppings (obviously)
  • A cast iron skillet (frying pan with a metal handle)
  • An oven with a grill (broiler)

How it works

  1. Put your skillet on your stovetop burner and preheat it on high heat for 15 minutes
  2. Turn on your grill and leave it long enough that you can see it glowing (if using an electric grill, gas versions won’t need to preheat)
  3. Prepare your pizza on a floured peel, making sure that your base is not larger than the base of the skillet
  4. Using oven mitts or a tea towel, take your skillet off the burner and turn it upside down. Slide your pizza onto the skillet.
  5. Quickly place the pizza + skillet on an oven rack below the grill. The top of the pizza should be 2-3 inches below the grill.
  6. Watch the pizza as it cooks, you can easily overcook if you aren’t careful. The pizza should take 2-3 minutes to cook. You may need to rotate your pizza 180 degrees half way through cooking.
  7. Before cooking your next pizza, return the skillet to the hotplate for a few minutes to reheat the base. Or use 2 skillets, alternating so that you don’t have to wait between pizzas.

This method works because the pizza is cooked evenly at a very high heat from above and below, similar to a wood fired oven. The pizzas were actually quite close in appearance to those from my wood oven, although the sides of the crust did not cook quite so evenly. But this trick is absolutely worth adding to your home made pizza arsenal!

NOTE: be very careful as the handle of the skillet will be very hot. Wear oven mitts and use a tea towel when lifting te pizza. This should only be done under adult supervision.

Fig, Walnut & Mascarpone Pizza with Pear

This pizza recipe is a bit of a different combination. You wouldn’t quite call it a dessert pizza, but is quite light and sweet and can definitely finish off a meal. I make my own plum sauce from our trees, and my sauce is quite light and tangy. If you can’t make your own, try an asian style plum sauce.

Ingredients

  • Plum Sauce
  • A small handful of Walnuts (freshly shelled makes a difference)
  • Mascarpone
  • Dried Figs
  • Honey (optional)
  • Thin slices of fresh Pear
  • Sugar
  • Lime juice

Method

  1. Drizzle plum sauce over your prepared pizza base. You don’t want the base totally covered.
  2. Drizzle some honey if using – just some thin swirls.
  3. Scatter the pizza with halved figs and halved walnut pieces.
  4. Finish with chunks of mascarpone – I use teaspoon sized pieces.
  5. Carefully slide into the preheated oven using your peel and bake until the crust is golden. Be careful with this one as the nuts can burn easily.
  6. While the pizza is cooking, slice your pear thinly and put the pieces in a bowl with the juice of one lime, and a teaspoon of sugar. Toss together to coat. When the pizza is cooked, finish by dressing with the slices of fresh pear and serve!

New Gluten Free Pizza Dough Recipe

This is a new version of a gluten free pizza base that I have been working on and I think it’s finally ready to share! I’m quite excited about this base – you would be hard pressed to pick it as gluten free and it tastes delicious. The key is to give the shaped base time to rise before topping and baking.

Full credit to the talented Dan Lepard who wrote a recipe for gluten free bread using psyllium husks. I had never used these before and they work amazingly well in gluten free doughs, helping the dough to rise naturally and giving a nice chew to the cooked base. I use both yeast and baking powder in this recipe to get as much lightness in the dough as possible without overloading on the taste of either ingredient. Another interesting addition can be to add some herbs and spices to the dough as in this gluten free pizza recipe. Maybe not for the purists but worth considering.

I have included links to some of the more unusual ingredients on Amazon, but you should be able to find them in your local health food store.

Ingredients – makes 2 bases

Ingredient Weight Measure Bakers Percentage
Rice flour 140g 1 Cup 100%
Tapioca starch 70g ½ Cup 50%
Cornflour 70g ½ Cup 50%
Soy flour 20g 2 Tbsp 14.3%
Psyllium husks 12g 2 Tbsp 8.6%
Guar gum (you could use Xanthan gum if preferred) 6g 2 Small Tsp 4.3%
Instant Dried Yeast 12g 4 Level Tsp 8.6%
Baking Powder 8g 2 Level Tsp 5.7%
Salt 8g 2 Level Tsp 5.7%
Olive oil, plus more for shaping 20g 2 Tbsp 14.3%
Sugar 20g 14.29%
Gluten free Vinegar 3g 2.1%
Warm water 110g 1/2  of a cup 78%

Method

  1. Mix together all of the dry ingredients
  2. Add the oil, vinegar and water and stir well for about 30 seconds. The dough should be a stiff, sticky paste.
  3. Lay out 2 squares of oiled baking paper. Oil your hands to prevent sticking, and separate the dough into equal sized lumps.
  4. Following the shaping technique from my previous gluten free dough recipe, press the dough into a disc shape. Drizzle with as much olive oil as needed to make the dough workable. Aim for a base about 4mm thick with a slightly raised edge.
  5. Lay a piece of plastic wrap or baking paper over each base to stop it drying out and leave to rise for about 1 hour. You should also start preheating your pizza stone at this point.
  6. Once the bases have risen for an hour and the oven is properly hot, add cheese, sauce and ingredients according to your recipe and slide the pizza along with its sheet of baking paper into the oven. Cook until the crust is starting to brown, rotating in the oven halfway through cooking if necessary. You can also finish it off under the grill for a minute to really get the top browned well.

NOTES: If you don’t have all of these ingredients, you could substitute the rice flour, corn flour & tapioca for a commercial gluten free flour mix. The soy flour could be replaced by millet flour, fine polenta or maize flour as it is used to add flavour and colour. If reducing the sugar at all, add a pinch more baking powder as the sugar helps the yeast leaven the bread. Salt can be reduced or eliminated completely; it is mostly for flavour.

Shaping pizza bases

Pizzaiolo competitors in the Pizza Olympics lend a certain mystique to the art of shaping pizza bases, spinning them into shape between their legs or behind their backs blindfolded. But stretching out a nice pizza base is a straight forward process and you will get great results in your own kitchen. This method is for non gluten free doughs, as gluten free doughs may not have enough elasticity to handle in this way.

TIP: The key to stretching out a base is to use dough that has been resting for at least 1 hour, preferably more. This gives the gluten in the dough time to relax, so that it spreads more easily. If you find the dough is too elastic and keeps springing back while shaping, cover it with plastic wrap and leave to rest for 10 minutes. If all of your dough is quite springy, do the first step of pressing out your dough into 1cm thick discs, then leave them all to rest for 10 minutes before stretching.

Method

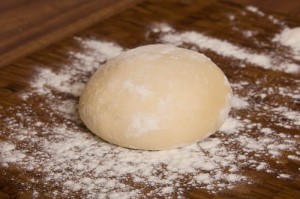
Place your dough ball onto a floured surface. If it becomes too sticky to handle at any point, dust with flour again.
Stretching-dough

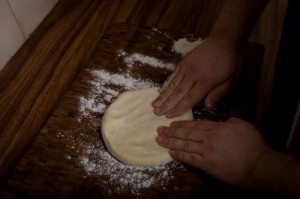
Start by pressing the dough ball into a disc shape, first with your fingertips and then with the flat of your hands. Try to get the dough as flat as possible before you start the next step. Pressing out the dough first makes it much easier to maintain a nice round shape in the finished base. You may find that you need to flip the dough over and press on the other side.
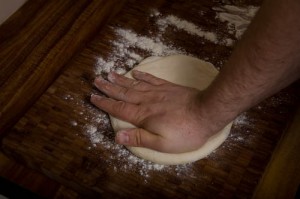
Stretching-dough-4 Stretching-dough-10

At this point you should have an evenly round disc perhaps 1cm thick.
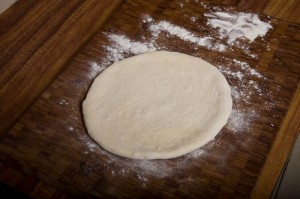
Stretching-dough-11

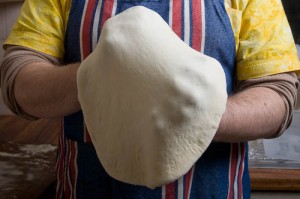
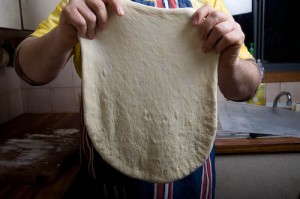
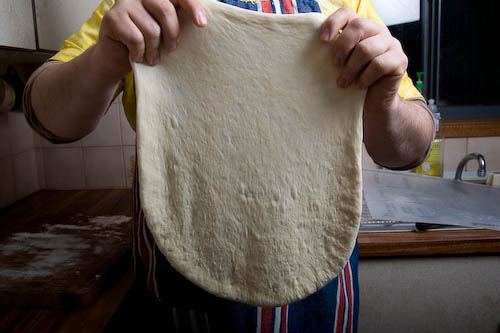
The next step is to stretch the dough. First, pick up the dough with your thumbs and forefingers near the outer rim. Stretch gently by moving your hands apart. Once you have stretched a section, rotate the dough and stretch again, working your way around the dough. Keep rotating and stretching until the base is a fairly even thickness.
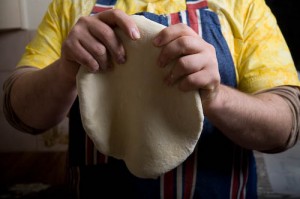
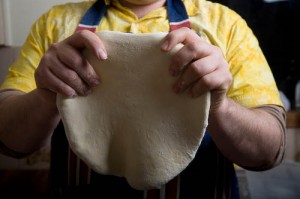
Stretching-dough-18 Stretching-dough-19

You may be able to achieve an even thickness just by stretching and rotating the dough as above. If not, try draping the base over your knuckles, with both hands clenched into fists in front of you. Gently move your hands apart to stretch the base out. Concentrate on any thicker areas that you might have missed. The thickness of your base may vary with personal taste, but I aim for a base around 2mm thick in most places, with a slightly thicker rim.

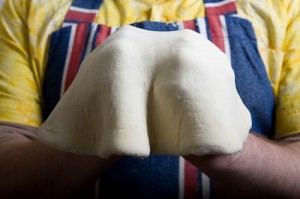
Stretching-dough-53 Stretching-dough-54
Stretching-dough-55 Stretching-dough-56

The base should now be ready to flip onto a floured peel and start topping. If you have ended up with a few minor tears in the dough, just squeeze them together – they will not be noticed in the finished pizza.
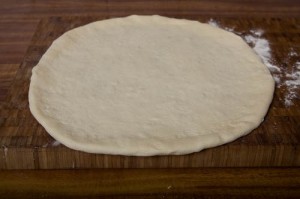
Stretching-dough-52

And that’s it! Don’t worry if this seems tricky, give it a try and you will be stretching and spinning bases in no time. Just take it slow, and start off stretching gently until you get a feel for your dough.

NOTE: If you aren’t confident to try this method, you can use a rolling pin to roll out your base. However rolling pins tend to knock more air out of the base, so stretching is the preferred method.