How to cook wood fired oven style pizza in your home oven in 20 minutes

Last night I planned to fire up the wood fired oven for a pizza party. I had my dough balls and ingredients ready and laid out, and even made a new peel for the occasion! The only problem was that when it came time to cook pizzas, my oven was too wet from all of the rain we’ve been having (I should really stop procrastinating and render the oven so that it doesn’t get waterlogged in the rain, but that’s another story).

Wondering how I could feed the hungry hordes without even having a pizza stone preheated in my inside oven, I remembered something else I read on the net a while back and thought I’d give it a try. It worked so well that I wanted to share it so that you too can have a backup plan if you need to cook some emergency pizzas one day!

You will need

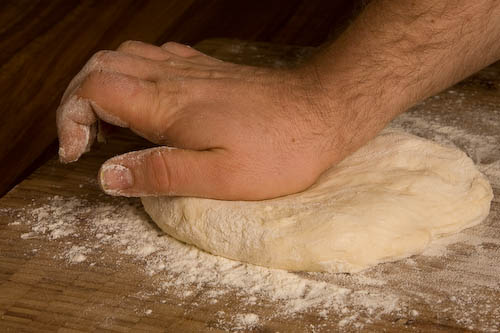
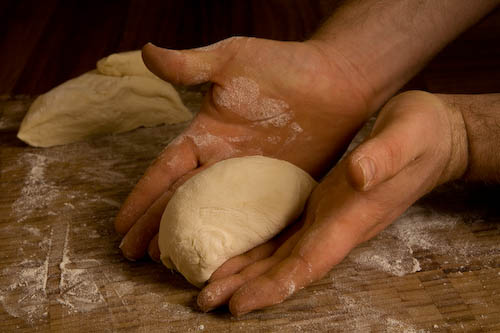
  • Pizza dough, sauce, other toppings (obviously)
  • A cast iron skillet (frying pan with a metal handle)
  • An oven with a grill (broiler)

How it works

  1. Put your skillet on your stovetop burner and preheat it on high heat for 15 minutes
  2. Turn on your grill and leave it long enough that you can see it glowing (if using an electric grill, gas versions won’t need to preheat)
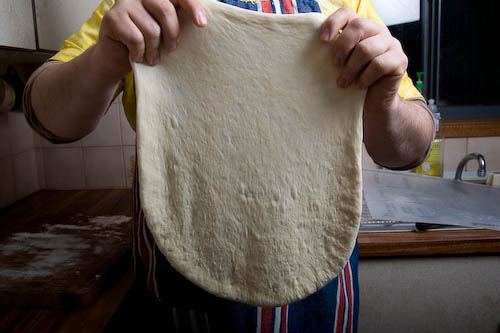
  3. Prepare your pizza on a floured peel, making sure that your base is not larger than the base of the skillet
  4. Using oven mitts or a tea towel, take your skillet off the burner and turn it upside down. Slide your pizza onto the skillet.
  5. Quickly place the pizza + skillet on an oven rack below the grill. The top of the pizza should be 2-3 inches below the grill.
  6. Watch the pizza as it cooks, you can easily overcook if you aren’t careful. The pizza should take 2-3 minutes to cook. You may need to rotate your pizza 180 degrees half way through cooking.
  7. Before cooking your next pizza, return the skillet to the hotplate for a few minutes to reheat the base. Or use 2 skillets, alternating so that you don’t have to wait between pizzas.

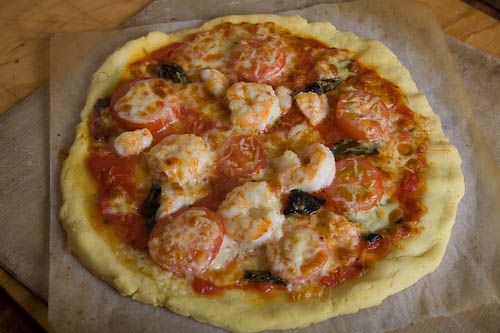
This method works because the pizza is cooked evenly at a very high heat from above and below, similar to a wood fired oven. The pizzas were actually quite close in appearance to those from my wood oven, although the sides of the crust did not cook quite so evenly. But this trick is absolutely worth adding to your home made pizza arsenal!

NOTE: be very careful as the handle of the skillet will be very hot. Wear oven mitts and use a tea towel when lifting te pizza. This should only be done under adult supervision.

Shaping pizza bases

Pizzaiolo competitors in the Pizza Olympics lend a certain mystique to the art of shaping pizza bases, spinning them into shape between their legs or behind their backs blindfolded. But stretching out a nice pizza base is a straight forward process and you will get great results in your own kitchen. This method is for non gluten free doughs, as gluten free doughs may not have enough elasticity to handle in this way.

TIP: The key to stretching out a base is to use dough that has been resting for at least 1 hour, preferably more. This gives the gluten in the dough time to relax, so that it spreads more easily. If you find the dough is too elastic and keeps springing back while shaping, cover it with plastic wrap and leave to rest for 10 minutes. If all of your dough is quite springy, do the first step of pressing out your dough into 1cm thick discs, then leave them all to rest for 10 minutes before stretching.

Method

Place your dough ball onto a floured surface. If it becomes too sticky to handle at any point, dust with flour again.

Stretching-dough

Start by pressing the dough ball into a disc shape, first with your fingertips and then with the flat of your hands. Try to get the dough as flat as possible before you start the next step. Pressing out the dough first makes it much easier to maintain a nice round shape in the finished base. You may find that you need to flip the dough over and press on the other side.

Stretching-dough-4 Stretching-dough-10

At this point you should have an evenly round disc perhaps 1cm thick.

Stretching-dough-11

The next step is to stretch the dough. First, pick up the dough with your thumbs and forefingers near the outer rim. Stretch gently by moving your hands apart. Once you have stretched a section, rotate the dough and stretch again, working your way around the dough. Keep rotating and stretching until the base is a fairly even thickness.

Stretching-dough-18 Stretching-dough-19

You may be able to achieve an even thickness just by stretching and rotating the dough as above. If not, try draping the base over your knuckles, with both hands clenched into fists in front of you. Gently move your hands apart to stretch the base out. Concentrate on any thicker areas that you might have missed. The thickness of your base may vary with personal taste, but I aim for a base around 2mm thick in most places, with a slightly thicker rim.

Stretching-dough-53 Stretching-dough-54
Stretching-dough-55 Stretching-dough-56

The base should now be ready to flip onto a floured peel and start topping. If you have ended up with a few minor tears in the dough, just squeeze them together – they will not be noticed in the finished pizza.

Stretching-dough-52

And that’s it! Don’t worry if this seems tricky, give it a try and you will be stretching and spinning bases in no time. Just take it slow, and start off stretching gently until you get a feel for your dough.

NOTE: If you aren’t confident to try this method, you can use a rolling pin to roll out your base. However rolling pins tend to knock more air out of the base, so stretching is the preferred method.

Kneading dough

Kneading is the process of working dough to help proteins join together and form gluten, which gives dough its strength and elasticity. The most common method of kneading is to press the dough flat, fold it over itself, squash flat again, and repeat.

Method

    1. Prepare your pizza dough according to the recipe you are using.
    2. When the recipe calls for kneading, proceed as follows steps. If the dough becomes too sticky to handle at any point, sprinkle a little flour as needed.
    3. Press the dough into a flattish lump, pushing forwards with the heel of your hand so that the dough is longer than it is wide.

knead1

    1. Pick up one of the long ends, and fold the dough back over itself.

knead2

    1. Rotate the folded dough a quarter turn.

knead3

    1. The dough is now ready to press flat with the heel of your palm again. Repeat these steps as many times as called for in the recipe.

knead4

Making dough balls

Shaping your pizza dough into balls before use is an important step. If shaped correctly the balls will tend to expand evenly as they rise, rather than slumping into puddles and sticking together in your tray. They will also be easier to stretch into a nice round pizza base. There are several good methods of making a dough ball but the key principle is to stretch the ‘skin’ of the dough around the ball to create surface tension. This surface tension is what helps the dough ball to hold its shape. This method works well but you can use any method which creates a tight ball.

Method

    1. Once you have finished preparing your dough according to your pizza dough recipe of choice, take a lump of dough weighed out to make one base.
    2. Sprinkle a little flour on the dough and your working surface to prevent sticking if necessary. Don’t overdo the flour at this point though, as you want the dough to stick to itself as you form the ball.
    3. Flatten the dough with the palm of your hand.

ball1

    1. Fold the dough in half.

ball2

    1. Fold the dough again, so that it is now folded into quarters.

ball3

    1. Turn the dough so that the folds are underneath, and you have a flat surface on top. Make a ‘karate chop’ shape with each hand, and press the bottom of each hand against the top of the dough, on the left and right sides.

ball4

    1. Applying pressure, squeeze the top of the dough over itself with the sides and bottoms of your hands and pinch together underneath.

ball5

    1. Keeping the bottom of the dough ball squeezed together, move one hand forwards and the other backwards. The dough ball should rotate in your hands while it squeezes together underneath.

ball6

    1. If necessary, you can pinch together the bottom a little to neaten up, or repeat the previous step. You should end up with a nice round dough ball! Dust the dough ball well with flour and set aside while you roll up the rest of your batch of dough.

ball7

Toppings

It’s sometimes easy to get carried away and cover your pizza with every topping you like. And fair enough, everyone has a good memory of the supreme from their favourite takeaway.

The problem with using a lot of toppings on a thin style base is that the base doesn’t support a lot of weight. It can also get soggy if overloaded. Using just a few toppings lets you play off different flavours against each other – you can really come up with some unique combos of just a few good ingredients.

A good rule of thumb is to use no more than 3 separate toppings, as well as cheese and/or sauce. Try to think of interesting flavours that will work well together. A good way to come up with a new idea for a pizza is to use some of the key ingredients in a favourite non pizza dish!

Whatever toppings you decide on, make sure not to lay them on too thickly. Aim for a single layer of all of the ingredients combined, on top of your cheese/sauce layer – this means that you might have to leave space between each ingredient.

This is a quick series showing a the process of putting together a simple prawn, tomato and basil pizza made on a gluten free base. The prawns were marinated in olive oil with a clove of mashed garlic whisked in. Delicious vine ripened cherry tomatoes were used – good quality tomatoes make a big difference and are worth the extra cost.

  1. A layer of sauce is spread over the base. Leave a rim around the edge for visual appeal and so you have a good place to hold the slices. When applying sauce, try to leave a few spaces with less or no sauce, so that the base doesn’t get too soggy when it cooks.
  2. Topped-pizza

  3. Scatter a sparse layer of mozzarella over the sauce. The purpose of this layer is really just to help hold the toppings to the base. Using grated cheese is also perfectly fine but I like using slices torn into pieces to vary the appearance and texture a little.
  4. Topped-pizza-2

  5. If you are using fresh herbs, it is best to put them underneath the other ingredients to stop them overcooking and drying out. Here, a handful of torn basil leaves are pressed into the dough.
  6. Topped-pizza-3

  7. Finally, an even layer of the prawns and sliced tomato are added, and a garnish of some extra whole prawns followed by another sprinkle of chunks of mozzarella and a little fresh grated parmesan.
  8. Topped-pizza-5

  9. And here’s how it looked straight out of the oven. The tangy garlic and prawns were wonderful together with the acidic sweetness of the tomatoes. A winning combo!
  10. Topped-pizza-6

Using a pizza stone

Wood fired ovens have some characteristics that really influence the pizzas that they produce. Most importantly they are extremely hot – often 400 degrees Celsius / 750F or more. This very hot environment cooks the pizza extremely quickly. The quick cooking time means that a lot of moisture remains in the dough after it is cooked which produces a lovely moist, chewy crust with a crisp outside. In contrast a thinnish crust pizza cooked on a tray in a home oven with a standard method might take 20 minutes or more to cook through, by which time the crust will be as dry as a cracker.

A genuine wood fired brick oven is not something everyone has room for, but a home oven can be greatly improved for pizza cooking by using a a ceramic or terracotta pizza stone. Pizza stones can be found at most good kitchenware or department stores fairly cheaply, and they are probably the most essential tool for making great pizza at home. If you don’t have a pizza stone and can’t get one easily, a common alternative is to use unglazed quarry tiles. I’ve had success using sandstone and granite tiles too, any untreated stone tile  should work. Failing this you can preheat a heavy baking dish in the oven and slide your pizza onto this instead.

pizza stone (1 of 1)-2
This stone tile cost me a dollar from a local hardware store. It is much stronger than a ceramic pizza stone and works just as well.

To use a pizza stone, put the stone on a shelf in your oven, and then turn the oven to its highest setting for up to an hour before cooking pizza. It’s important to preheat the stone for a fair while, as it absorbs heat slowly. Experiment with different positions in your oven – I recently got a new oven but was disappointed with the results using a stone in the top shelf, which worked well in my last oven. Moving the stone down a shelf made a huge difference – every oven probably has a different hottest spot.  If you are in a hurry and don’t have time to preheat a stone properly it is better not to use one at all, as pizza will take much longer to cook if the stone is absorbing all of the heat from the oven – try this method instead. Once the stone is really hot, slide your pizza directly onto the stone using a peel. The stone acts as a heat bank and radiates the heat that it has absorbed, cooking your pizza quickly.

Most thin crust pizzas cooked on a properly preheated stone should be ready in as little as 5-7 minutes.

TIP: In ovens that have a top element for grilling (broiling), switch over to the grill on medium heat after 5 or 6 minutes of cooking. This gives a beautiful burst of heat to the top of the pizza to crisp up your cheese. The bottom of the pizza will continue to cook from the heat of the stone. Just keep a close eye on it so the toppings don’t burn.

pizza stone (1 of 1)
Your nice new pizza stone will end up looking like this very quickly.


Pizza peel tips and tricks

A pizza peel is a kind of wood or metal paddle, used to slide a pizza into the oven, move and turn it while cooking, and take it out again when it’s done. Pizza peels allow you to make a pizza in advance, then slide it directly onto a pizza stone to cook, without damaging the base or disturbing the toppings. This is a critical skill to master for wood fired ovens, where pizzas are placed deep in a very hot oven. Peels are very useful for home pizza cooking as well, but a shorter handled peel like this one will do the job.

The best peel for home use is a wooden one. A wooden pizza peel will help slide you pizzas without sticking, as the wood absorbs some of the moisture from the base and stops it from sticking. The worst disaster is when your pizza sticks to the peel, changing its graceful slide into a messy cartwheel. This may well be how calzone was invented!

Before using a wood pizza peel, sprinkle some flour over it and then rub the flour into the wood. Over time, your peel becomes even more slippery as it builds up a coat of flour.

Once you have floured your peel, you simply place a prepared pizza base on it, add your toppings, and slide it into the oven!

TIPS:

  • It can be useful to keep several peels, so you can prepare a few pizzas at once and put each into the oven as soon as the last is cooked.
  • Instead of using wheat flour on your peel, try using white rice flour. This is less prone to absorb moisture and become sticky, and it is also less likely to burn on the pizza stone. I keep a small shaker of rice flour handy for this purpose.
  • If your pizza sticks to the peel, try quickly but carefully shaking the peel back and forth. If this doesn’t work, try lifting the spot where it is sticking and brushing some flour underneath.
  • If you don’t have a peel, you can use a flat cookie tray, turned upside down. If you do, don’t leave the pizza sitting on it for too long as it may stick! Or, try making your own.