Pizzaiolo competitors in the Pizza Olympics lend a certain mystique to the art of shaping pizza bases, spinning them into shape between their legs or behind their backs blindfolded. But stretching out a nice pizza base is a straight forward process and you will get great results in your own kitchen. This method is for non gluten free doughs, as gluten free doughs may not have enough elasticity to handle in this way.
TIP: The key to stretching out a base is to use dough that has been resting for at least 1 hour, preferably more. This gives the gluten in the dough time to relax, so that it spreads more easily. If you find the dough is too elastic and keeps springing back while shaping, cover it with plastic wrap and leave to rest for 10 minutes. If all of your dough is quite springy, do the first step of pressing out your dough into 1cm thick discs, then leave them all to rest for 10 minutes before stretching.
Method
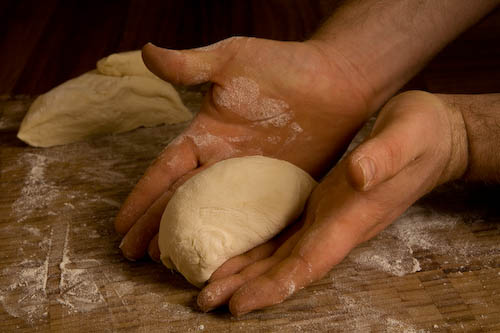
Place your dough ball onto a floured surface. If it becomes too sticky to handle at any point, dust with flour again.

Start by pressing the dough ball into a disc shape, first with your fingertips and then with the flat of your hands. Try to get the dough as flat as possible before you start the next step. Pressing out the dough first makes it much easier to maintain a nice round shape in the finished base. You may find that you need to flip the dough over and press on the other side.


At this point you should have an evenly round disc perhaps 1cm thick.

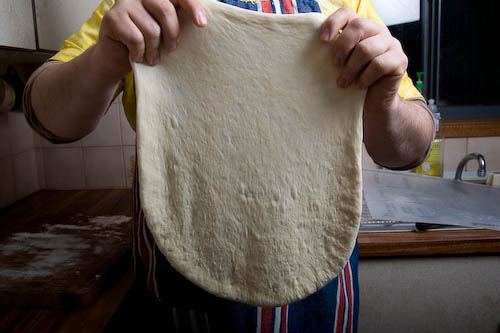
The next step is to stretch the dough. First, pick up the dough with your thumbs and forefingers near the outer rim. Stretch gently by moving your hands apart. Once you have stretched a section, rotate the dough and stretch again, working your way around the dough. Keep rotating and stretching until the base is a fairly even thickness.


You may be able to achieve an even thickness just by stretching and rotating the dough as above. If not, try draping the base over your knuckles, with both hands clenched into fists in front of you. Gently move your hands apart to stretch the base out. Concentrate on any thicker areas that you might have missed. The thickness of your base may vary with personal taste, but I aim for a base around 2mm thick in most places, with a slightly thicker rim.


The base should now be ready to flip onto a floured peel and start topping. If you have ended up with a few minor tears in the dough, just squeeze them together – they will not be noticed in the finished pizza.

And that’s it! Don’t worry if this seems tricky, give it a try and you will be stretching and spinning bases in no time. Just take it slow, and start off stretching gently until you get a feel for your dough.
NOTE: If you aren’t confident to try this method, you can use a rolling pin to roll out your base. However rolling pins tend to knock more air out of the base, so stretching is the preferred method.