How To Dry Salt Cure Olives

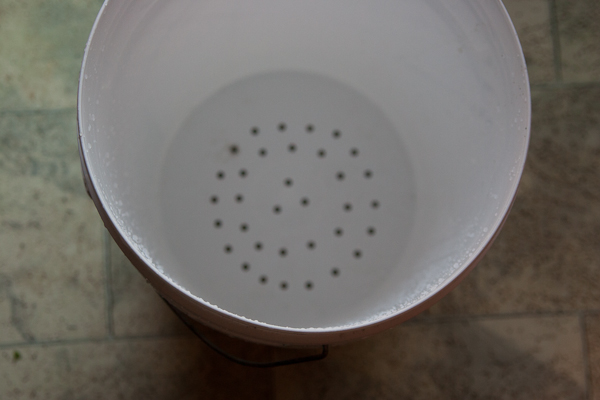
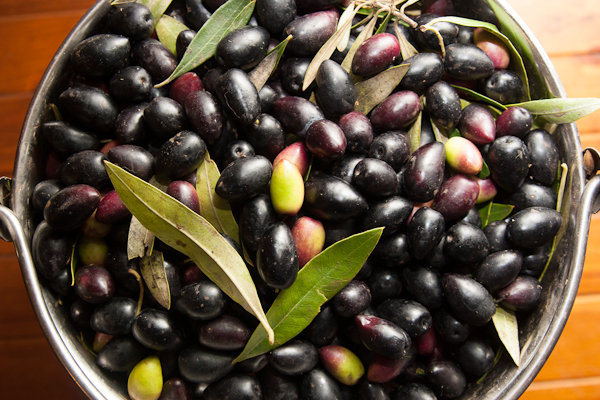
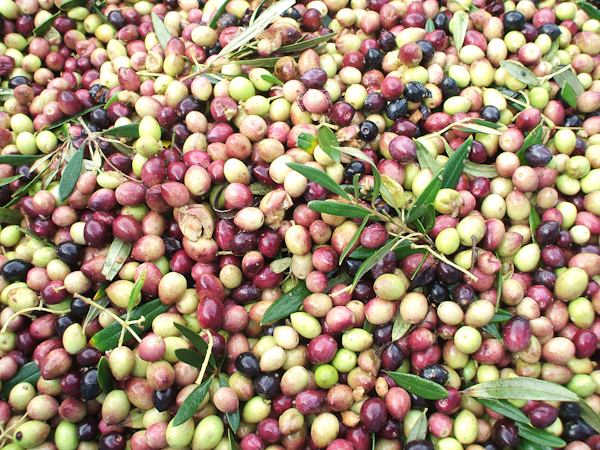
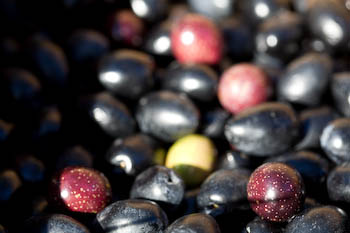
I love having lots of homemade olives around but I have to confess that sometimes I’m a bit slack with changing pickling liquid every day. Luckily there’s a method that suits my temperament very well – just chuck the olives and dry salt into a bucket and stir once a week. You don’t have to slit each olive or change the water or anything like that and best of all I think these are my favourite tasting olives too – they are kind of leathery and wrinkly, surprisingly they don’t actually taste all that salty though! Most of the salt draws liquid out of the olives and then runs away. Theres a really noticeable flavour of olive oil that I don’t get from brined olives. The method & equipment I’m using for this years batch is below. I bought 2 large plastic buckets with lids, and drilled holes in the bottom of one. The olives and salt go in the bucket with holes, which sits inside the other bucket to catch the juice. In previous years I’ve used a colander, anything that holds the olives and lets a bit of liquid drain out is fine.

Dry Salt Cured Olives – The method

1. Use bucket (or a large colander, large basket etc) with holes in the bottom so liquid can drain out. I sat a clean tea in the bottom of the olive bucket to stop too much salt falling out. Set the bucket over another bucket or tub to catch the juice.

olives (2 of 2)

2. Layer olives with salt in the bucket – about twice the weight of olives to salt. A 20 liter bucket holds up to 10kg olives with 5kg salt. Cover all of the top with a layer of salt.

olives (1 of 1)

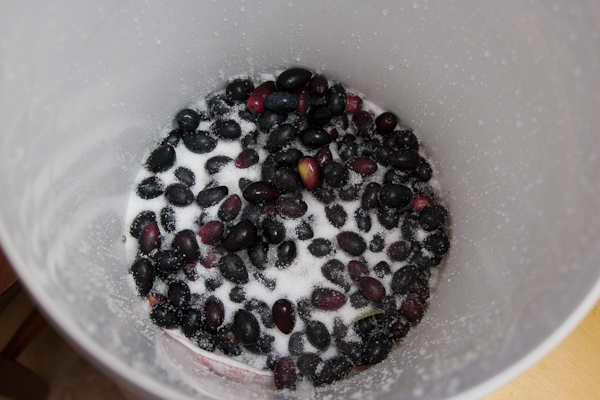
3. Stir the olives around once a week so that they all contact salt evenly – it’s easiest to empty the outer tub of liquid, tip the olives into it then back into the strainer, and finally add a fresh layer of salt on top.

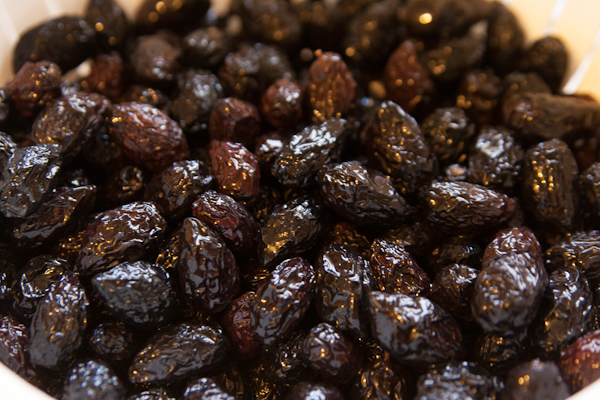
4. After a few weeks, start tasting. Continue the cure until bitterness is gone. This might take from 4-6 weeks, depending on the olives. When they are ready, remove olives from salt – I shook them through a big colander. Then rinse off remaining salt and let them dry.

salt olives (1 of 1)-2
Voila!

The cured olives can be stored in a 3% salt brine, or brine+vinegar but I like them best just kept in olive oil in jars or vacuum sealed bags. This year I mixed up chilli, garlic powder, fennel seeds and paprika to marinate the olives that were then vac-packed in serve-sized bags. They keep pretty well but I’ve seen recommendations to freeze them when vac packed to keep them fresh for even longer.


It’s Olive Season!

I spent a day recently with a few eager family members picking olives for oil, and a few for eating. This might sound a little sadistic but I really like picking olives. It’s a much easier job than picking grapes and you end up with nice soft skin at the end of the day because of all the oil that rubs off. It was a good day, sunny bar a few heavy showers that had us sheltering in the car. Peter, the farmer who sold us the olives, had a refreshing outlook on life. He said he does what he does because he loves it – the growing, picking, pruning, and of course fishing on the beach that is visible from his olive grove. “You don’t need money to be happy.” Not a new sentiment maybe but Its rare to hear someone say it and so obviously mean it.

olives (1 of 1)-3

We ended up with 500kg of olives – looking forwards to getting oil back from the press this week! I posted about the general method for picking olives  last time and nothing new to report – a few nice big bits of shade cloth spread out under trees to catch the olives, and little rakes to strip the branches. The rakes are sold by Italian stores like Gaganis Bros and Constante Imports in Adelaide and Melbourne respectively if you’re looking (I know Constante ship interstate, not sure about Gaganis).

olives (1 of 2)

Last time I cured some olives for eating, the dry salt cured were the most delicious so I’ve made a much larger batch this year – Now that they are ready to eat, I’ve written up the whole method here.

olives (1 of 1)-4


Picking And Curing Olives

Olive oil is an important part of Italian cooking, at least for some regions – that spicy, peppery taste gives an extra dimension to anything it touches. I’ve always wanted to make my own oil but my olive tree is still too small and experiments with wild roadside olives have produced mixed results. This year I got lucky though – my uncle has an untended olive grove on his property and invited the family to come pick some before the emus got them!

Picking olives by hand takes a while, but there is a trick to doing it efficiently. We spread large pieces of shade cloth and tarpaulins on the ground, and then attacked the trees with olive rakes – small handheld plastic rakes that slip easily over leaves and branches but catch the fruit. When each tree was bare, we carefully gathered up the shade cloth and tipped olives into waiting buckets. The olives go to a local plant for pressing. Olives can yield around 10-15% of their weight in oil; I’d be very happy if my share is 20 litres.

Using an olive rake
Collecting the olives

My uncle also has a stand of plump Kalamata olives, so I picked some for curing. Preserving olives isn’t too hard but there a lot of variations – some recipes use lye, some dry salt, some brine and some fresh water. I don’t love the idea of using lye (sodium hydroxide) and in the past my fresh water cured olives have tended to go off more easily, so this year I tried wet and dry salt curing. If they taste as good as I hope these will end up on pizza in tapenade, salads and foccacia among many other uses!

Kalamata olives for curing

Brined olives

Rinse olives, discarding any soft or shrivelled ones. Fill a clean jar or crock pot with the olives.
Make up brine with 5% cooking salt by volume –half a cup of salt in 10 cups of water. Pour this brine over the olives until covered.

Olives need to stay completely submerged while curing so that mould doesn’t get a chance to grow above the level of brine. A helpful trick I picked up a while ago is to place a loose piece of cling wrap over the vessel, press it down to the surface, then pour a little more brine on top.

Change this brine every day or two, until the olives are no longer bitter – this might take a few weeks. Taste regularly after the first week so you know when they are done.

Finishing brine

Once the initial curing is complete, the olives are marinated in a finishing brine mixture. This mixture helps preserve the olives and can also add other ingredients for flavour. I use one third of a cup of salt to 5 cups of water and 2 cups of red wine vinegar. Other common ingredients are bay leaves, rosemary, garlic, oregano, chilli or basil – add any of these to your own taste. Fill clean jards with the olives, top up with finishing brine and then add a layer of olive oil which will float on top of the jar and prevent air contact. Olives preserved in this way should last for up to a year in the fridge, but will likely be eaten long before that!

Dry cured olives

Half fill a large jar or crock pot with olives. Pour over coarse sea salt until the olives are covered.
Every day, carefully tip out any liquid that has collected in the bottom of the vessel. Taste the olives every week or so until they no longer taste bitter, then preserve with finishing brine as above.

Dry salt cured olives

Resources

Cooking with olives

Pickling olives – includes lye methods

Olive oil from tree to table

Salt cured olives recipe