There’s a few different methods of cutting pizza, with the pizza wheel being the most traditional. Wheel cutters are suitable for most pizzas, with the exception perhaps of pizzas with toppings that can easily be disturbed – things like whole prawns and so on. For those pizzas I use scissors or a single rocker blade style cutter, but for everything else I use a Zyliss cutter, one of the best pizza cutters I have used!
You can see the difference between this and a more traditional wheel cutter – the large handle lets you get a really good grip, and because the blade is supported on both sides it feels more sturdy that the old fashioned cutters.
To clean, the plastic part is hinged on one corner, so the blade can be removed. It seems to be dishwasher safe after many cycles, which is a bonus if you eat pizza often (I do).
Ready For Cleaning
I use a diamond stone to sharpen the wheel, but I have to say it’s trickier than sharpening a knife (as are all pizza wheel cutters). More to come on that as I figure out the best technique. To be honest, it might be easier to just buy a new wheel every year or two!
Wood fired ovens have some characteristics that really influence the pizzas that they produce. Most importantly they are extremely hot – often 400 degrees Celsius / 750F or more. This very hot environment cooks the pizza extremely quickly. The quick cooking time means that a lot of moisture remains in the dough after it is cooked which produces a lovely moist, chewy crust with a crisp outside. In contrast a thinnish crust pizza cooked on a tray in a home oven with a standard method might take 20 minutes or more to cook through, by which time the crust will be as dry as a cracker.
A genuine wood fired brick oven is not something everyone has room for, but a home oven can be greatly improved for pizza cooking by using a a ceramic or terracotta pizza stone. Pizza stones can be found at most good kitchenware or department stores fairly cheaply, and they are probably the most essential tool for making great pizza at home. If you don’t have a pizza stone and can’t get one easily, a common alternative is to use unglazed quarry tiles. I’ve had success using sandstone and granite tiles too, any untreated stone tile should work. Failing this you can preheat a heavy baking dish in the oven and slide your pizza onto this instead.
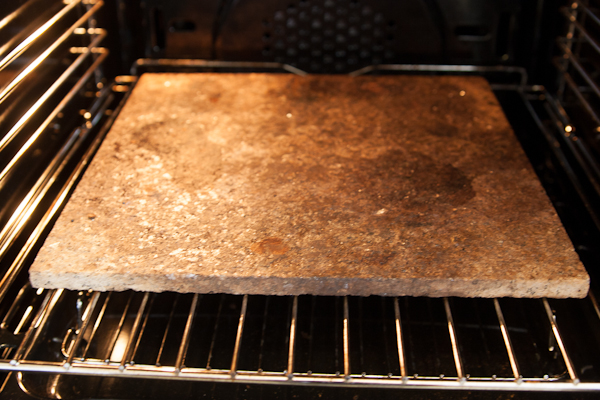
This stone tile cost me a dollar from a local hardware store. It is much stronger than a ceramic pizza stone and works just as well.
To use a pizza stone, put the stone on a shelf in your oven, and then turn the oven to its highest setting for up to an hour before cooking pizza. It’s important to preheat the stone for a fair while, as it absorbs heat slowly. Experiment with different positions in your oven – I recently got a new oven but was disappointed with the results using a stone in the top shelf, which worked well in my last oven. Moving the stone down a shelf made a huge difference – every oven probably has a different hottest spot. If you are in a hurry and don’t have time to preheat a stone properly it is better not to use one at all, as pizza will take much longer to cook if the stone is absorbing all of the heat from the oven – try this method instead. Once the stone is really hot, slide your pizza directly onto the stone using a peel. The stone acts as a heat bank and radiates the heat that it has absorbed, cooking your pizza quickly.
Most thin crust pizzas cooked on a properly preheated stone should be ready in as little as 5-7 minutes.
TIP: In ovens that have a top element for grilling (broiling), switch over to the grill on medium heat after 5 or 6 minutes of cooking. This gives a beautiful burst of heat to the top of the pizza to crisp up your cheese. The bottom of the pizza will continue to cook from the heat of the stone. Just keep a close eye on it so the toppings don’t burn.
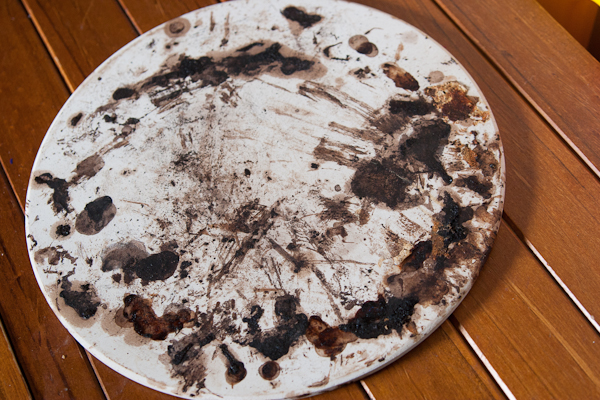
Your nice new pizza stone will end up looking like this very quickly.
A peel is one of the most useful tools in the pizza-makers arsenal. Peels can be bought fairly cheaply online or at most good kitchenware suppliers.
You can also make your own peel easily using sheets of medium plywood. They might not look quite as nice, but they will work fine! I have a couple of homemade peels as well as a bought one, and the extras come in handy at pizza parties where lots of guests want to get their pizza ready at the same time.
You will need:
Medium thickness plywood – look for around 3-4mm thick (1/4″)
An electric jigsaw or hand coping saw.
Sandpaper
Method
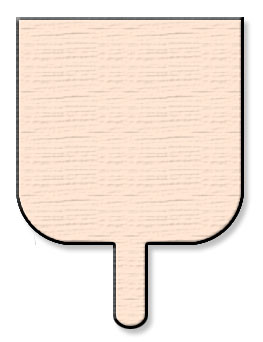
1. Start by tracing out the design of the peel. The basic design is a square with a handle at the back. You can round the corners here and there for appearance. Here’s an example of the shape you are aiming for.
2. Make it a little wider than the size of the largest pizza you think you’ll make – eg a bit bigger than your pizza stone. Just make sure it will fit in your oven!
3. Once you have cut out the shape, use sandpaper to clean up any rough parts around the edges. You can also use sandpaper to create a slight slope on the front edge of the peel to help slip under your pizzas more easily.
4. Before using the peel, rub some cooking oil into the wood with a clean cloth and allow to stand to soak in.
A pizza peel is a kind of wood or metal paddle, used to slide a pizza into the oven, move and turn it while cooking, and take it out again when it’s done. Pizza peels allow you to make a pizza in advance, then slide it directly onto a pizza stone to cook, without damaging the base or disturbing the toppings. This is a critical skill to master for wood fired ovens, where pizzas are placed deep in a very hot oven. Peels are very useful for home pizza cooking as well, but a shorter handled peel like this one will do the job.
The best peel for home use is a wooden one. A wooden pizza peel will help slide you pizzas without sticking, as the wood absorbs some of the moisture from the base and stops it from sticking. The worst disaster is when your pizza sticks to the peel, changing its graceful slide into a messy cartwheel. This may well be how calzone was invented!
Before using a wood pizza peel, sprinkle some flour over it and then rub the flour into the wood. Over time, your peel becomes even more slippery as it builds up a coat of flour.
Once you have floured your peel, you simply place a prepared pizza base on it, add your toppings, and slide it into the oven!
TIPS:
It can be useful to keep several peels, so you can prepare a few pizzas at once and put each into the oven as soon as the last is cooked.
Instead of using wheat flour on your peel, try using white rice flour. This is less prone to absorb moisture and become sticky, and it is also less likely to burn on the pizza stone. I keep a small shaker of rice flour handy for this purpose.
If your pizza sticks to the peel, try quickly but carefully shaking the peel back and forth. If this doesn’t work, try lifting the spot where it is sticking and brushing some flour underneath.
If you don’t have a peel, you can use a flat cookie tray, turned upside down. If you do, don’t leave the pizza sitting on it for too long as it may stick! Or, try making your own.