Polenta Quiche

After reading about the benefits of getting more calories from good oils and protein and eating less carbs I came up with this recipe for polenta quiche, which has about 300 calories per serve, half from fat, and with 20g of carbs. I’m making up large batches and freezing slices so I have healthy tasty breakfasts on hand for the morning rush. It’s interesting to see how it comes out of the oven – the recipe is easy to make because you really just mix and bake and the heavier polenta settles to the bottom forming a crust on its own. Like any quiche recipe you can vary the fillings a lot – I like using some corn kernels and a rasher of bacon diced and fried up with the onion. Add some butter for a richer quiche.

Ingredients

  • 6 Eggs
  • 1 Tbsp Rice flour (or wheat flour if not making gluten free)
  • 1/2 onion, diced fine
  • 1 Spring onion, sliced
  • 2 Tbsp Olive Oil
  • 1 Tbsp diced tasty cheese
  • 1 Sprig parsley, sliced
  • 1/2 Cup Polenta
  • 2/3 Cup milk
  • 1/2 Tsp baking powder (use gluten free if required)
  • Other fresh herbs if liked
  • 1 Clove garlic, chopped fine
  • Pinch each salt & pepper

polenta quiche (1 of 4)

Saute the onion in 1 tbsp of olive oil over medium heat until clear.

Mix all ingredients together and stir very well.

Tip into a greased pan – I use a loaf tin but a round quiche/pie dish could also work.

Bake in a medium oven – (I used 180C/350F fan forced) until brown and no longer wobbling.

polenta quiche (2 of 4)

polenta quiche (3 of 4)

polenta quiche (4 of 4)
Here you see the polenta has settled somewhat, making the bottom more like a crust while the top half is light and fluffy!

More Reading

More Low Carb recipes

Another delicious looking GF quiche

A cheap kindle book with lots of quiche & pie recipes

Herb Omelette

I am writing down this recipe to share the enjoyment of picking fresh garden greens on a sunny spring morning – there is something very satisfying about cooking like this. The only remaining piece of the puzzle is to get our own chickens for really fresh eggs!

I vary this recipe depending on what is in the garden, today it is rocket (arugula), flat leaf parsley, thyme, oregano, spring onion and a little new spinach.

Herb Omelette (1 of 7)
Here is part of the oregano jungle
Herb Omelette (2 of 7)
My rocket is going to seed – but it still tastes good!

Ingredients

Herb Omelette (3 of 7)

  • 2-3 eggs
  • About 1 cup of mixed herbs and greens – spinach, spring onions, chard, oregano, whatever is good!
  • 1 Tbsp of diced or grated parmesan
  • A grind of black pepper and a pinch of salt
  • A pinch of dried garlic powder or a clove of fresh garlic, chopped
  • Optionally a pinch of red chilli flakes

Method

Dice greens roughly and herbs fine.

Mix all ingredients in a bowl and stir together with a fork.

Herb Omelette (4 of 7)

I think eggs overcooked are ruined, so I cook them over low-medium heat until just done. Heat a skillet and add a nice piece of good butter (go on, you’re about to work it off in the garden anyway aren’t you?) and a glug of olive oil.

Tip the egg mixture into the pan and cook until it starts to look cooked all the way through – a few minutes. Then carefully flip and cook the other side for a minute. It might help to carefully loosen all around the edges with an egg flip before flipping.

Herb Omelette (6 of 7)
Not quite ready to flip

Eggs and chilli are a really yummy combination so I eat omelette with a dab of a delicious Harissa (chilli paste) from My Country Kitchen (I can’t find a website for them but bought at the Willunga markets). That plus a nice espresso = the breakfast of champions!

Herb Omelette (7 of 7)

How To Make Ricotta Gnocchi

Soft fluffy gnocchi are one of my favourite comfort foods so when I heard they can be made with ricotta instead of potato I couldn’t wait to try it. The principle is the same and if anything this recipe is more forgiving than potato gnocchi because the ricotta cheese seems to help bind up the gnocchi when they are cooked. I served my first batch tossed through some fresh basil pesto but next time I’m going to try a simple tomato sauce – I think they needed a bit more zing. I’ve also seen these made as spinach and ricotta gnocchi with the addition of some chopped blanched or frozen spinach to the dough.

Ingredients

  • 500g/1lb ricotta cheese. Look for the stuff that comes by the wedge or wheel instead of the gluggy stuff you sometimes get in a tub. The gluggy stuff works but needs more flour added, so the gnocchi will be a little chewier.
  • 1 tbsp grated parmesan
  • about 1/2 cup plain flour
  • a grind of salt and pepper
  • optionally, a pinch of garlic powder

Method

Mix cheeses and seasoning together in a bowl.

ricotta gnocci (1 of 1)

Add just enough flour so that the dough can be worked easily and be formed into shapes. It should be smooth but not dry. For the drained ricotta I found, 1/2 cup of flour was about right for half a kilo of ricotta.

ricotta gnocci (1 of 1)-2

Roll pieces of dough into a snake about the thickness of your finger. Cut each snake into lengths about twice that width.

ricotta gnocci (1 of 1)-3

The pieces can be cooked now, but it helps sauce stick to the gnocchi if they are given some texture. This is traditionally done by rolling each piece over a ridged board with your thumb. The result is a slightly hollow shell with lines around the outside. I use a ridged gnocchi board like these ones on Amazon. Alternatives are to use the back of a fork, or a cheese grater – all work well.

ricotta gnocci (1 of 2)
Using a gnocchi board, push away with your thumb


ricotta gnocci (2 of 2)
The gnocchi curls around your thumb, creating a depression and ridges for the sauce to cling to!
ricotta gnocci (1 of 2)-2
Instead of a gnocchi board, a cheese grater works…


ricotta gnocci (2 of 2)-2
…or the tines of a fork.

To cook, bring a big pan of water to the boil with a good dash of salt. Cook batches of as many as will fit in the pan in a layer. Cook for a minute or so after they bob to the surface before removing with a strainer. If moving to a dish to serve I find it best to drizzle some oil or butter into the dish first to stop the gnocchi sticking together.

ricotta gnocci (1 of 1)-4

My Recipe For Spaghetti Bolognaise

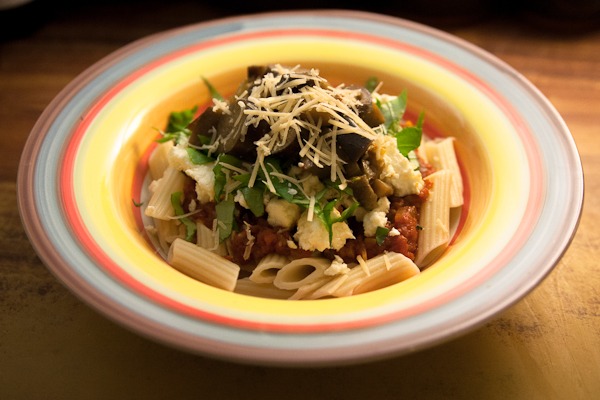
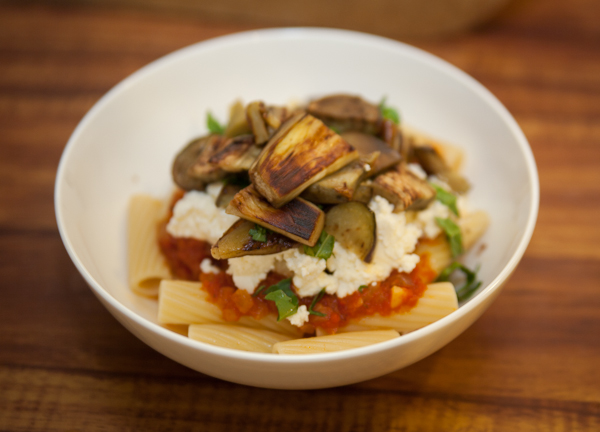
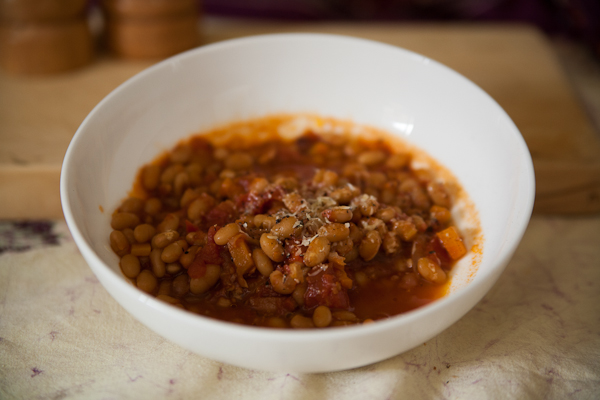
A staple in my families diet is some variation on bolognaise sauce – a rich, tomato and meat based sauce (although we do a vegetarian version with red lentils too) plus whatever vegetables are around, served with pasta. Zuchini, eggplant, capsicum and mushrooms all make an appearance at times but this is the classic version that we make for pure comfort food. My recipe probably isn’t far from many others – it isn’t a complex dish but so rewarding to make well with good fresh ingredients. I don’t use a lot of meat because I think the sauce should accompany the pasta but not dominate it. Traditional bolognaise recipes sometimes add a little milk or cream when nearly finished – I haven’t tried that yet because I like the rich version so much! Traditional recipes also use chicken liver, but at risk of excluding myself from the rest of the foodies I’m not a huge fan of eating offal.

Note – Katie Caldesi writes in The Italian Cookery Course that smoky bacon is overpowering in bolognaise sauce but I don’t agree (although the book is excellent). However if smoky bacon isn’t liked it can be replaced with a good non smoked bacon or similar cured pork, like pancetta, guanciale, or even diced salami.

Ingredients

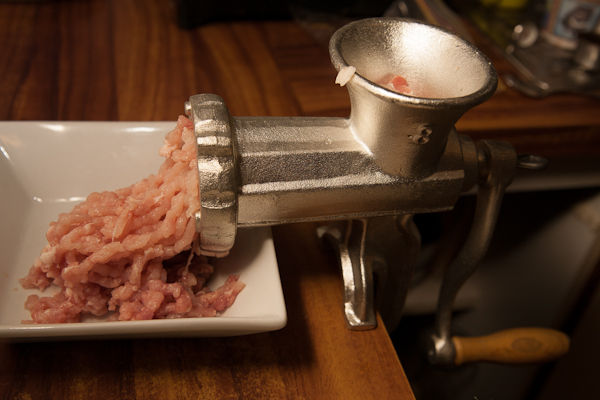
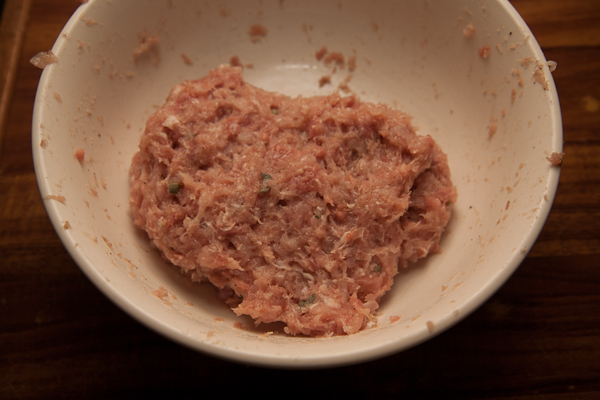
  • 1/2 kg (1lb) ground beef – as often as not I use packaged mince from the supermarket but when I have time to grind my own the difference is very obvious.
  • 1 rasher good smoky bacon
  • 1 stick celery
  • 1 carrot
  • 1 onion
  • 2 tins plum tomatoes or tomato passata
  • 1 glass red wine
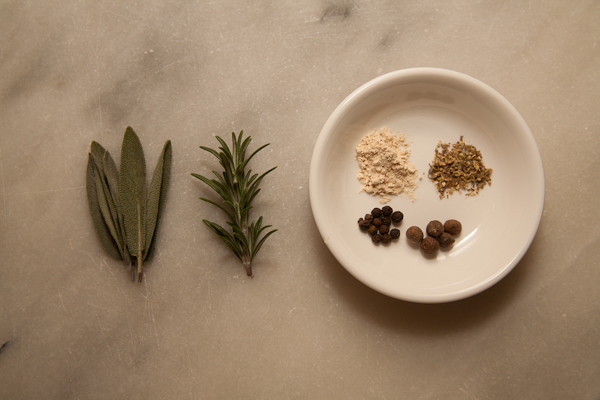
  • 1 small sprig rosemary –  about 1 tsp when diced fine
  • 1 generous pinch dried oregano – the stuff to look for comes from the flowering heads and is a tan/green colour, crumbly with a pungent smell. Plain dried oregano leaves don’t have so much flavour.
  • 1 pinch chilli flakes
  • 1 bay leaf
  • 3 cloves garlic
  • olive oil
  • salt and pepper

Method

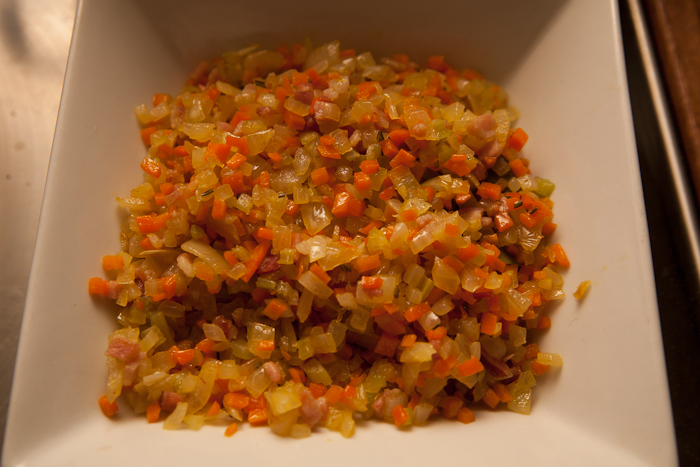
Dice carrot, onion, celery and bacon as fine as practical. Add to a large saucepan or frying pan over medium heat with 2 tbsp olive oil, bay leaf and finely chopped rosemary.

spaghetti bolognese (1 of 16)

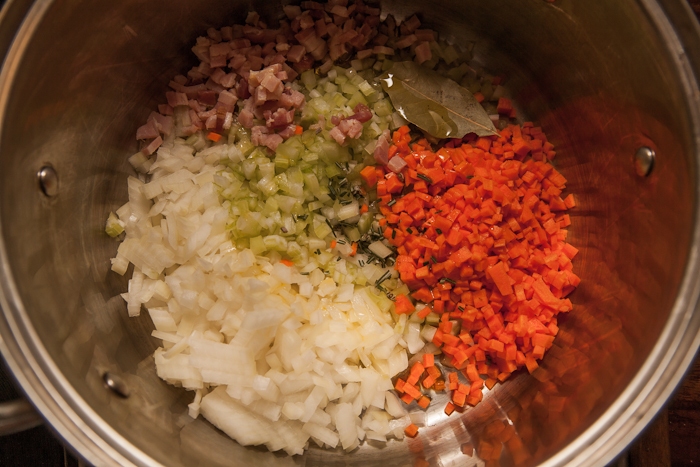
Stir regularly until well cooked, about 10 minutes. The onion should look translucent and starting to brown and the other vegetables should look soft. Remove the vegetables and set aside.

spaghetti bolognese (3 of 16)

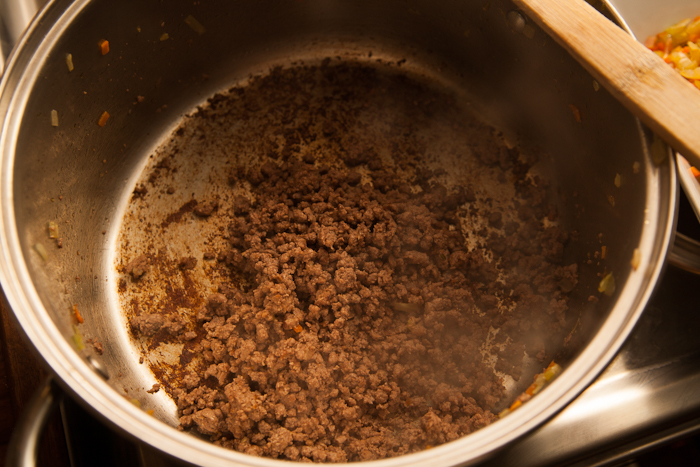
Add 1 tbsp olive oil to the pan and tip in the ground beef. Stir now and then until the beef is well browned.

spaghetti bolognese (6 of 16)

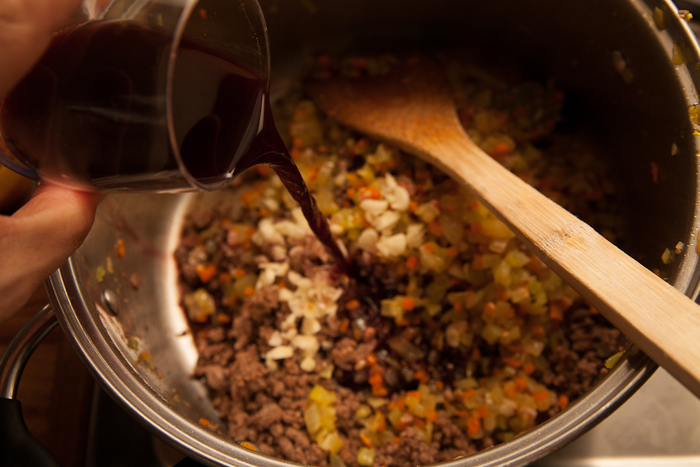
Crush and dice garlic and add to the pan together with the vegetables and 1/2 glass of wine. Scrape the bottom of the pan to loosen all the tasty browned bits. Stir the mixture over medium-high heat until the wine is bubbling. The rest of the wine is for the cook to drink while they are hard at work!

spaghetti bolognese (7 of 16)

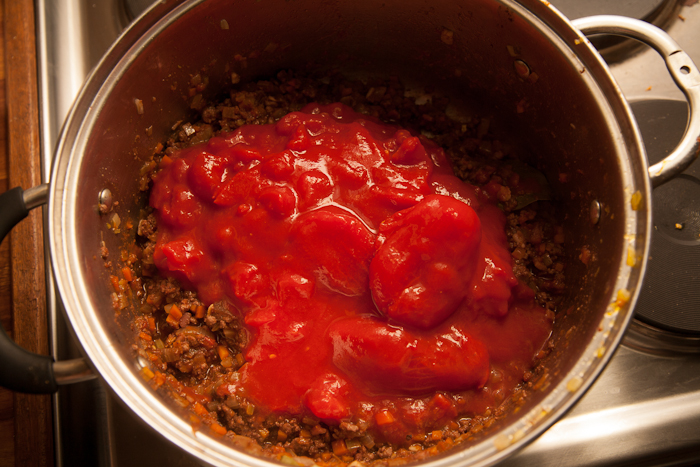
I picked up the next step from FX Cuisine . Tip about 1/2 cup of tomato mixture in to the pan and stir until most of the liquid has boiled off. Continue to stir for a minute over high heat. Concentrating and browning some of the tomato like this adds another layer of flavour.

spaghetti bolognese (11 of 16)

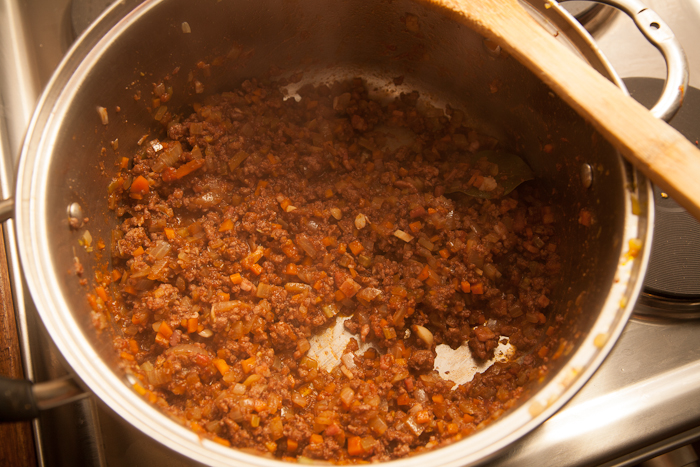
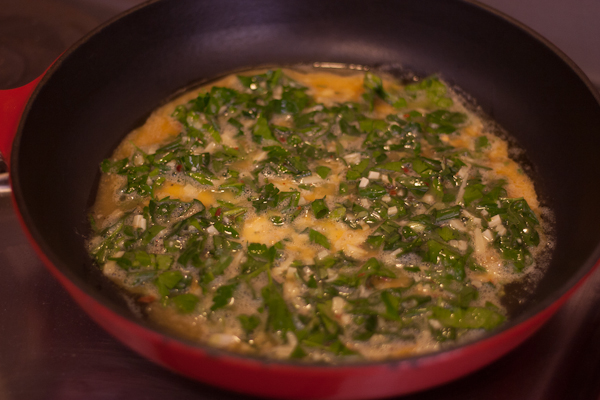
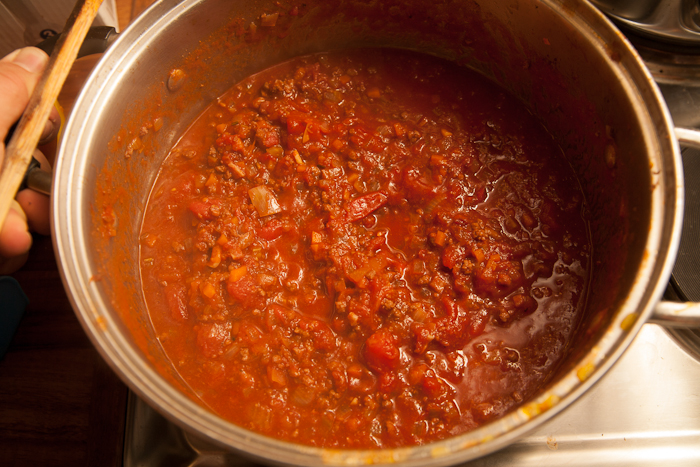
Add the rest of the tomatoes, chilli flakes and oregano. Use a spatula to smash the tomatoes until large chunks are broken up. Half fill the cans with water, swish around, and add the water to the pan too. Reduce to medium heat and simmer for 45 minutes or more, until fairly thick. If the sauce boils down and becomes too dry before 45 minutes is up, add just a little more water. When done, taste and add as much salt as is needed.

spaghetti bolognese (12 of 16)

spaghetti bolognese (14 of 16)

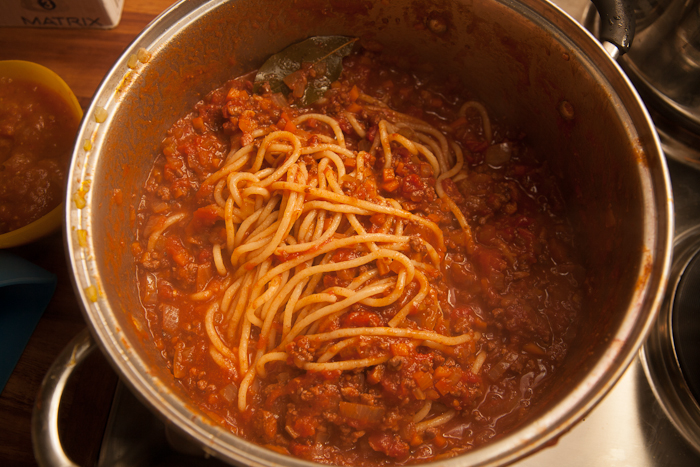
Bring your largest pot of water to a rolling boil and add a few tsp salt. Cook pasta until done. This sauce is great with a pasta with some body like fettucine or tagliatelle. Normal spaghetti doesn’t really do it justice despite the name of this recipe – I served it here with fresh bigoli made with semolina, a very fat type of spaghetti with rough edges. I’ve seen the wisdom of tossing cooked pasta through the sauce to coat it well – the extra flavour in each mouthful is hard to argue with. Use tongs or a pasta server to lift a serve of pasta into each bowl, then spoon more sauce over the top.

spaghetti bolognese (15 of 16)

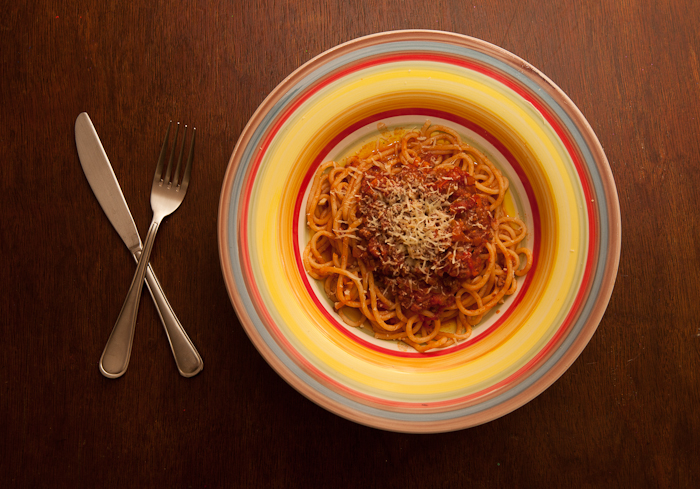
Serve with grated parmesan and cracked black pepper.

spaghetti bolognese (16 of 16)

If you liked this…

Spaghetti Bolognese? No Thanks! – A great little Kindle ebook for $3.50 from an Italian about which recipes are and aren’t authentic – I enjoyed it. You can read Kindle books on PC, even in a browser directly now so you don’t need an actual Kindle.

All about bolognese sauce on Wikipedia – interesting historical facts for real food nerds

Maggie Beer’s version, with chicken liver

This version adds cream at the end and combines pork and beef – worth trying

Chicken & Sage Sausages

It is satisfying to make fresh homemade sausages and I have resolved to make them more often. The whole thing takes less than an hour, and it would be easy to make double the amount and freeze some for later. The best thing is coming up with your own fillings – they can be as crazy or as normal as you like. I have plans for a mega chilli sausage but tonight I did a chicken + fresh herb version. Most recipes call for extra fat for a juicier sausage but if you want a few less calories you can go without – the sausage will be less juicy but still nice.

A few quick tips – Michael Ruhlman in Charcuterie and Paul Bertolli in Cooking By Hand both say a sausage stuffer should be used to fill sausage casings instead of a funnel on a grinder. The problem with the grinder is that chunks of fat can break down too much and then leak out when cooked instead of hanging around to add juicy flavour. This version is the cheapest sausage stuffer on Amazon that gets OK reviews while these ones cost nearly 3 times as much but get much better reviews all round. I’m sold, not that it takes much to make me want a new kitchen gadget, but until I can track one down the old funnel on the mincer is all I have. If using a grinder with funnel, Ruhlman suggests chilling the mince mixture before sending it through the grinder the second time to fill the sausages.

I used to find that fat and sinew got caught on the grinding plate of my grinder, eventually blocking it up and spoiling the texture. It seems like this happens to even the experts sometimes but making sure the die and cutting blade in my grinder were sharp made a big difference. I just rub the flat side of each on a fine diamond stone now and then. Storing the dies and cutter in a zip lock bag with a drop of oil rubbed over stops them from rusting. The other thing that helps is to dice the meat and then pop it in the freezer 30 minutes before starting.

chicken sage sausages (1 of 8)
Sage, rosemary, garlic powder, oregano, pepper, pimento

Ingredients

  • 750g/1.5lb Chicken thighs
  • 4-5 small sage leaves
  • 1 small sprig rosemary – about 1 tsp chopped
  • 1/2 tsp cracked black pepper
  • 1/2 tsp ground allspice (pimento)
  • 1 tsp garlic powder
  • 1 tsp dried oregano
  • 1 generous tsp cooking salt
  • Sausage casings – natural casings need to be soaked in water before use, then flushed through with more water. Synthetic casings can be used dry.
chicken sage sausages (2 of 8)
If you notice the mine isn’t coming out cleanly, stop and take out the cutting die – it’s probably clogged with sinew

Making The Sausages

1. Chop fresh spices finely. Grind any dry spices that need it.

2. Cut chicken into rough chunks and spread out on a tray. Put it in the freezer about 30 minutes before grinding.

3. Pass chicken through the grinder – I used the finest die. When no more is coming out take half a slice of bread and send it through the grinder to push out the last bits. Stop when the bread starts to come through. It’s surprising how muc more this gets you, at least another sausage worth.

4. Time to get messy: Put the mince in a mixing bowl with all other ingredients and knead until well mixed and the meat feels sticky – a minute or two.

chicken sage sausages (3 of 8)

5. When filling I have been using the largest cutting die on my grinder so it doesn’t clog as much. I fit a length of casing over the funnel, working it right down until no more fits and tie a knot in the end.

6. I can just manage this next bit on my own but it’s more fun with an extra person helping – the meat mixture is fed into the grinder or stuffer and cranked or pressed through the funnel. The person on the casing end lets the casing slip off fast enough for the sausage to be plump but not stuffed tight so that it has room to cook.

chicken sage sausages (4 of 8)

7. I fill the whole length of the casing before twisting into sausages. When twisting , adjust the pressure in each link so that it isn’t too tight – keep in mind that twisting will make each sausage a bit tighter too. Alternate which way each link is twisted or else they’ll come undone – eg twist clockwise, then anti clockwise in order.

chicken sage sausages (5 of 8)

chicken sage sausages (6 of 8)
These were just a bit too tight – a couple split when cooking

I think sausages are best cooked over a moderate heat so they cook through and get nice and brown without burning. I tried par-cooking before I cut the links so the mix didn’t spill out the ends. Seemed to work.

chicken sage sausages (7 of 8)

Bangers and mash are a classic so we ate our sausages with buttery, garlicky pumpkin+sweet potato mash and gravy.

chicken sage sausages (8 of 8)

Baked Eggs

I was in Melbourne last month for work and my brother in law said I had to go to Hardware Societe. Unfortunately  when I got there, I couldn’t get a table or even the attention of a waiter to start the process of getting a table. I gave up on breakfast that morning but I never gave up on the idea of baked eggs and this weekend I did two variations, both with pulses in a tomato based sauce finished with eggs baked on top. This is a seriously hearty breakfast that I plan on eating much more often, although it would make sense to make up the sauce the night before to save time. I’m treating this as more of an amazing new  concept than a specific recipe and I will use whatever is in season – I chucked some zucchini and pumpkin into one of my versions too and will be trying one with beans soon.

baked eggs with lentils (1 of 1)

baked eggs with lentils (1 of 3)

Baked eggs with lentils

  • 1 cup cooked lentils (or canned)
  • 1 1/2 cups tomato passata or blended tinned tomatoes or plain pasta sauce
  • 1/2 brown onion
  • 1 carrot, peeled
  • 1 stick celery
  • 1 red or yellow capsicum (pepper)
  • 2 cloves garlic
  • 1/2 tsp cinnamon – I love a hint of cinnamon with lentils!
  • 1 tsp paprika
  • 1 tbsp chopped fresh herbs – any of thyme, basil, oregano, marjoram
  • olive oil
  • salt and pepper
  • 1 egg per person
  1. Finely dice onion, carrot, celery, capsicum, garlic. Sautee over medium heat in a dash of olive oil till soft, around 5 minutes.
  2. Add cinnamon, paprika, fresh herbs, tomato passata and lentils. Simmer for about 15 minutes, stirring occasionally. If the mixture gets so dry it sticks, add a dash of water.
  3. Taste the sauce and season with salt and pepper to taste.
  4. Spoon sauce into a casserole dish or individual servings. I’ve been eying off a set of individual casseroles like these for a while but don’t have any yet, so I used large soup mugs. Use a spoon to make an egg sized depression in the sauce for each serve and crack in an egg. Cover the dish (foil works) and bake until the egg is cooked right. Mine took about 15 minutes in a hot oven. I served with a little flat leaf parsley and grated parmesan and of course toast fingers are an obvious match for creamy egg yolk…

My second version replaced the lentils with chickpeas, and I used up a little leftover pasta dough to make a few noodles for the sauce. I did this one in a single casserole. Soooo good!

baked eggs with lentils (2 of 3)

baked eggs with lentils (3 of 3)

Is this the best pumpkin soup recipe ever?

There’s no doubt Autumn is here – it’s been raining and leaves are turning yellow and orange. Today as I listened to the wind chimes jangling I started to think of comfort food, and since I have one of the seasons first home grown pumpkins waiting to be used this recipe was a natural choice. I don’t like to brag but my pumpkin soup recipe, refined through the years, is getting pretty good. It helped win my fiancées heart when I cooked it on our first date and if you choose to use it as a love potion too I can nearly guarantee your success.

Use the ripest pumpkin you can find – the flesh should be a deep yellow to orange when cut, depending on variety and the stem should appear dry. I used a butternut (also called a squash in some parts). Some recipes call for the pumpkin to be roasted to deepen the flavour before it is boiled but if you start with a ripe pumpkin, I don’t think it is necessary – although by all means give it a go if the pumpkin isn’t as ripe as you’d like. I suggest about 1kg of pumpkin but more or less is fine, depending on how much pumpkin you have. I used about 2/3 of the monster below.

pumpkin soup (1 of 1)

Ingredients

  • 1 large carrot
  • 1 large potato
  • 1 brown onion
  • 1 ripe pumpkin (about 1kg / 2lb)
  • 1 liter of stock – chicken or vegetable. Or water if you don’t have stock.
  • 1 rasher of good smoky bacon or pancetta
  • 2 cloves garlic
  • 1/2 tsp nutmeg, freshly grated if possible
  • 1/2 tsp turmeric
  • 1 tsp paprika
  • 1 tbsp olive oil
  • 1 tbsp butter
  • salt and pepper

To Serve

  • 1 small bunch of coriander (cilantro)
  • sour cream

1. Remove the bacon rind. Finely dice the bacon, onion, carrot and garlic. Add to a large saucepan over medium heat with the butter and olive oil.

2. While you’re stirring the onion etc, roughly dice the potato and peel and dice the pumpkin. It’s easy to peel the pumpkin by cutting thick slices first, then cutting the skin off each slice.

3. Once the onions are starting to look transparent, add the potato and pumpkin and stock. If there isn’t enough stock to cover the pumpkin top up the pan with water. Bring to a boil, then reduce the heat and simmer until the pumpkin is soft and falling apart – about 1 hour.

4. Stir in the paprika, nutmeg and turmeric and simmer for another few minutes.

pumpkin soup (1 of 1)-2

5. Remove from the heat and allow to cool slightly. Use a hand blender to puree the soup in the pan until it’s smooth and creamy.

6. Taste and season with salt and freshly cracked black pepper to your taste.

7. Ladle into bowls and add a spoonful of sour cream to the middle of each one. Use a fork to twirl the sour cream in a little whirlpool pattern, but not so much that it is mixed in – just leave a few trails. Scatter each bowl with a little chopped coriander. Serve with a nice crusty white bread and butter.

pumpkin soup (1 of 1)-3
Mmmmmmm

More:

A good hand blender is the easiest way to get the soup nice and creamy – this Cuisinart one comes in every colour you could want.

Pumpkins are easy to grow if you have a little space, and very rewarding. Here is a pretty good guide.

My recipe is ‘straight’ pumpkin but I love a curried pumpkin soup too – here’s a take on that (and they make it look so good…)

Pasta Alla Norma

First off I have to give credit to the incomparable FXCuisine, where I got this recipe for Pasta Alla Norma. If you haven’t seen his site, check it out.

Pasta Alla Norma is a Sicilian dish, simple to make but deliciously rewarding. It is made up of good pasta – usually larger shapes like penne -topped with a simple tomato sauce, ricotta salata, basil and fried eggplant (aubergine). I made this when I wanted to offer a good dinner to guests but I was in a hurry that day as this is so simple to make – I made the sauce the day before to save time.If you can find a bronze die pasta it will have a better texture for the sauce to stick to, but don’t sweat it too much!

Ricotta salata is a salted and aged version of ricotta. I couldn’t find any at short notice so I used normal ricotta and while the dish was good, I thought it needed an extra kick that the ricottta salata would have provided. I added some fresh grated parmesan and I recommend using that or pecorino with your ricotta if you can’t find ricotta salata either. I’ve also seen versions of this recipe calling for capers which would have the same effect – you want a punchy, salty ingredient to go with the smooth flavours of eggplant. Serious Eats suggest trying a saltier cheese like sheeps milk fetta as another option. I took this advice for my second attempt at the dish and it was excellent – I mixed equal parts creamy fetta and ricotta, then used that in place of ricotta salata.

The dish is best with a simple but tasty tomato sauce, something like a good can or 2 of  tomatoes blended up  (I use my own preserved tomato sauce) and simmered with some tomato concentrate, garlic, salt and pepper and herbs. I think at a pinch you could use a good jar of simple tomato passata from a store, with a bit of salt and pepper.

pasta alla norma (1 of 1)

Ingredients

  • 2 Eggplants (aubergines), firm/young ones if possible, diced/sliced
  • 500g / 1lb good quality pasta – penne, macaroni or other larger shapes
  • 4-5 Cloves of garlic
  • 3 Tbsp olive oil
  • About 2 cups of pasta sauce of your choice (see above)
  • 250g / 1/2lb Fresh ricotta or ricotta salata or ricotta mixed with fetta (see above)
  • Fresh grated parmesan or pecorino to serve
  • 1 Small bunch of basil

Method

  • Prepare or heat up the pasta sauce.
  • Fill a large saucepan nearly to the top with hot water and put it on the stove, high heat. Stir in 1/2 tbsp salt. Put the lid on while it comes to a boil.
  • Crush and dice the garlic. Add to a large frying pan with the olive oil over medium-low heat, and cook stirring occasionally until the garlic is just golden brown. Remove and discard the garlic (the flavour is now in the oil).
  • Add the eggplant to the frying pan and cook, stirring and turning until it is all nicely browned. Keep the heat fairly low, you want it to cook through and get golden brown on the outside without burning. This step might take 10-15 minutes.
  • While the eggplant cooks and as soon as the pot of water is boiling vigorously tip in the dried pasta and stir well. After 8 mins or so start tasting a piece now and then for done-ness. Cook until done how you like it – not so long that it starts to get very soft and lose its shape.  When cooked, ladle the pasta out into a strainer using a slotted spoon and set aside.
  • To assemble the dish, ladle some pasta into each bowl, then top with a good splash of pasta sauce. Crumble over the ricotta and parmesan/pecorino. Use kitchen scissors to snip little bits off the bunch of basil, adding around 1 tbsp to each bowl. Finally, top with the cooked eggplant.

When eating, you stir the ingredients through so you get a bit of everything in each mouthful – the different flavour combinations are mouth watering.

pasta alla norma (1 of 1)-2
Here’s an update – my second attempt at the dish, using a mixture of fetta and ricotta for the cheese.


Traditional Baked Beans

baked beans (1 of 1)

2 seemingly unrelated facts led me to try out a new recipe today.

1: I think beans can be among the most delicious of all foods – rich, creamy, satisfying and healthy.

2: I need work lunches!

Since I often fall back on tinned baked beans I decided to try making my own. In an old family cookbook I have a recipe for ‘Mrs Abbenantes Baked Beans’ that I loosely based this on.

Ingredients

  • 2 cups dried Haricot beans (you could substitute other white dried beans or a few tins of already cooked beans if in a hurry).
  • 2 rashers smoky bacon
  • 2 carrots
  • 1 onion
  • 3 cloves garlic
  • 1 capsicum (pepper)
  • 1 tsp paprika
  • 1 tsp dried oregano
  • 1 bay leaf
  • 1 tsp honey
  • 1 tsp salt
  • 2 tins diced tomatoes
  • 2 fresh ripe tomatoes (optional – but it adds a little zing)
  • 1/2 cup red wine
  • olive oil

Method

  1. Unless using tinned beans, soak the beans overnight in plenty of water. Then drain the water, and put the soaked beans in another pan with enough fresh water to cover them well (water as deep above the beans as the width of your hand or so). Bring to a boil, then simmer for 1-2 hours. After an hour, start tasting the beans now and then to see if they are done – they should be soft, but not falling apart. Try not to stir too much while they cook to avoid breaking them up. When done, drain and set aside.
  2. Dice the capsicum (pepper), bacon, onion and carrot medium fine. Mash and dice the garlic. Over medium heat, saute in a saucepan with a glug of olive oil until starting to soften and brown – 5-10 minutes.
  3. Add the wine, bay leaf and other spices (and diced fresh tomato if using). Stir for another minute or so.
  4. Add the tinned tomatoes, cooked beans and honey along with 4 cups of water. Put the lid on the pan and simmer on fairly low heat for about an hour, stirring now and then. If the mixture dries out too fast add a little more water.
  5. After an hour remove the lid and continue to simmer until the mixture is as thick as you like, stirring often. Remove the bay leaf and season to taste with more salt if needed.

I ate mine with a drizzle of good olive oil, grated parmesan and black pepper – delicious. The plan is to freeze portions for work lunches – but we will see how much is left over as I just went back for seconds…