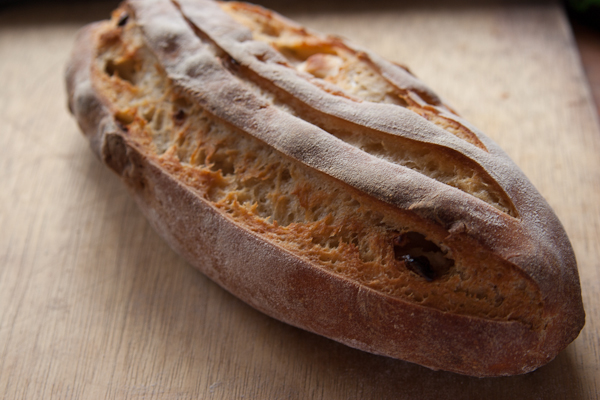
The apple season has just finished where I live. To preserve some of the fruit my parents made a big solar drier and have dried a lot of apples from their orchard. I was thinking about warm bread last night while I looked at a stack of these dried apples and had a lightbulb moment – apple sourdough!
Fruit sourdough is delicious with the contrast between tangy bread and sweet fruit, and I added just a touch of spice. Although I used dried apple any fruit would work. I submitted this recipe to the yeastspotting blog too – check it out, plenty of inspiration there if you need some.
Ingredients
400g (about 3 1/2 cups) white flour
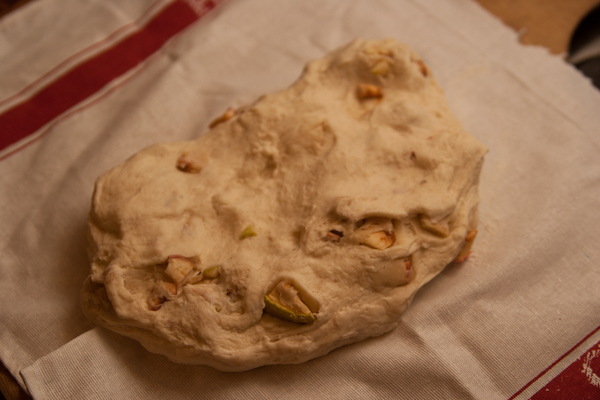
1 handful of dried apples (or other fruits) cut into in smallish pieces
Mix all dry ingredients together. Add sourdough starter and honey and stir in. Add most of the water and mix well. Continue adding water until the dough is workable and not too sticky. Allow to rest for 10 minutes, then knead for a few minutes or until smooth. For more detail, see my post on making a sourdough loaf.
Leave until well risen – mine took overnight.
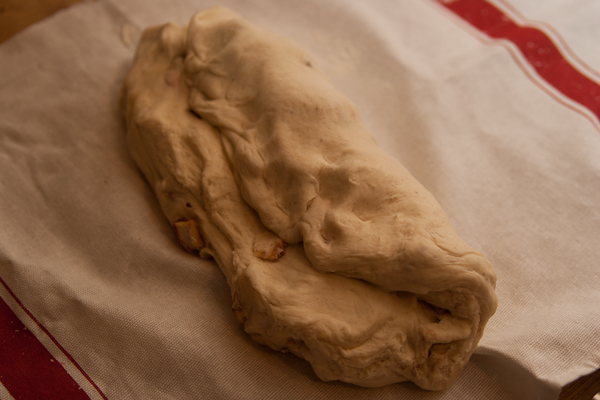
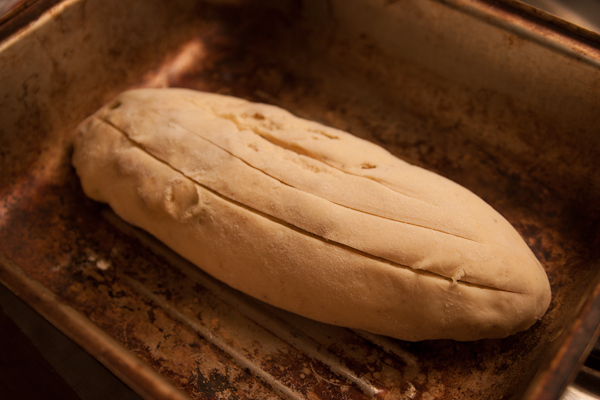
Shape into a loaf by flattening out the dough into a sheet about 2-3cm (1 inch) thick and longer that it is wide.
Fold one third of the dough over itself.
Then fold over the other third to make a cylinder. Pinch shut along the seam. Turn the loaf over so the seam is on the bottom. This folding gives the dough some internal structure that helps stop it sagging as it rises.
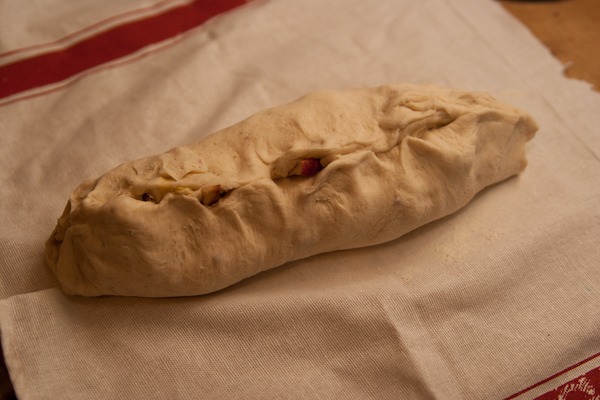
Set the loaf aside, covered with a lightly floured cloth until it has risen noticeably again – mine took another 2 hours.
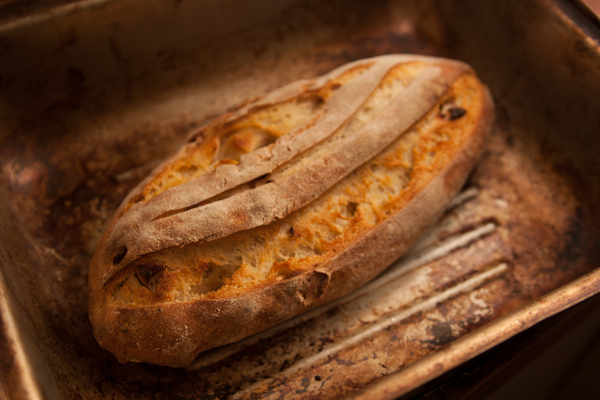
I bake bread in an old aluminium roasting pan. I cooked with the lid on for 30 minutes at 230C (450F) for 30 minutes, then took the lid off and baked another 15 minutes to let it brown up.
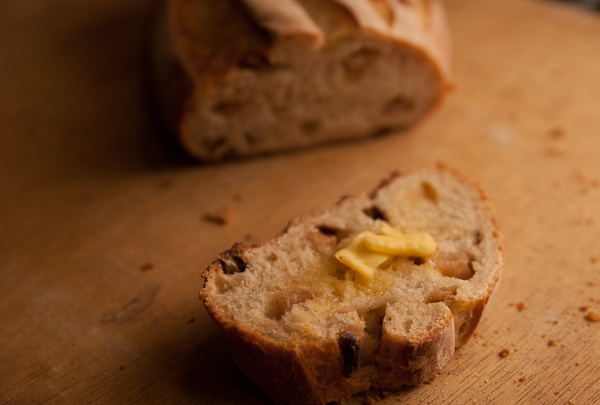
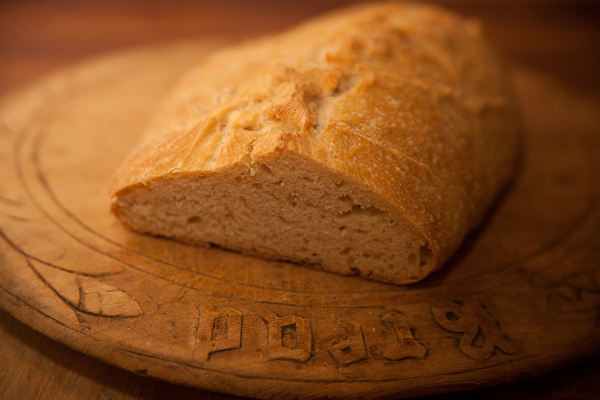
Slathered with good butter, this bread was a success! The apple rehydrated slightly but still gave a concentrated hit of tart/sweet flavour that worked with the sourdough.
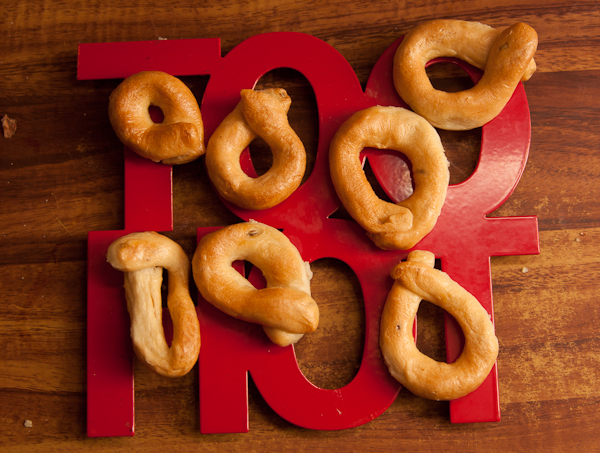
Taralli are one of those snacks that sound simple but deliver so much flavour that you can’t stop till you’ve eaten way more than you should. They are basically ring shaped bread sticks, often made with fennel seeds but also other flavours like chilli flakes or herbs. They are shaped, briefly boiled to give them a nice smooth skin, then baked until crispy. Yesterday I had some spare sourdough starter to use so I made a sourdough batch. If you don’t have sourdough handy just use a 1/4 teaspoon of yeast.
Ingredients
2 cups plain white flour
1/4 cup sourdough starter
level tsp salt
1/2 cup water + a little more for adjusting the dough
1 tbsp whole fennel seeds, or any other flavours. Oregano flakes or chilli flakes are nice. I think you could use grated parmesan too but I haven’t tried it yet. You can also make them plain.
Method
Mix all ingredients together. Add more water, 1 tablespoon at a time until the mixture is smooth but not too sticky. Turn out onto a board or clean benchtop and knead for a minute until smooth.
Put the dough in a covered bowl and leave until it has risen noticeably but not significantly. With my sourdough starter this was 4-5 hours. If you’re using instant dried yeast 2 hours will likely be long enough.
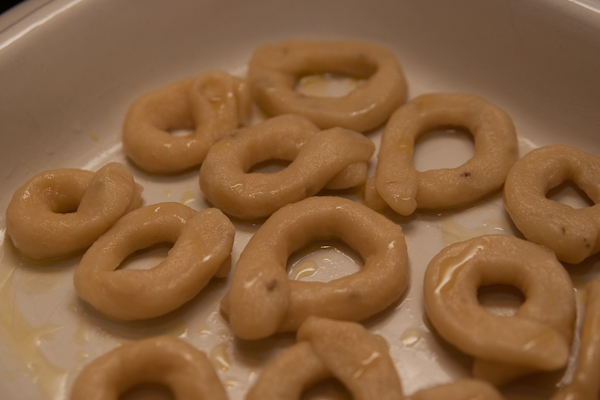
Bring a pot full of water to a simmer; drizzle a little olive oil into a large baking tray.
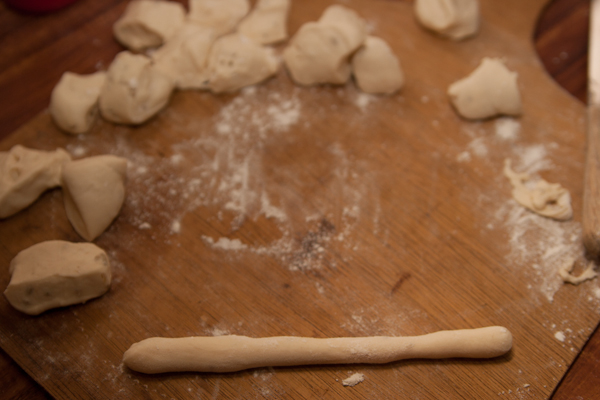
Divide the dough into pieces about the size of a large grape, eg about a heaped teaspoon.
Roll each piece between your hands to make a snake about 10cm /4 inches long and 1cm / 2/5 of an inch thick.
Make a ring out of the snake and give the ends a squeeze so they stick together. Each ring needs to be boiled for about a minute, until it floats, then scooped out with a slotted spoon and transferred to the oiled tray. If you work fast you can drop them into the water as you go – otherwise add them in batches.
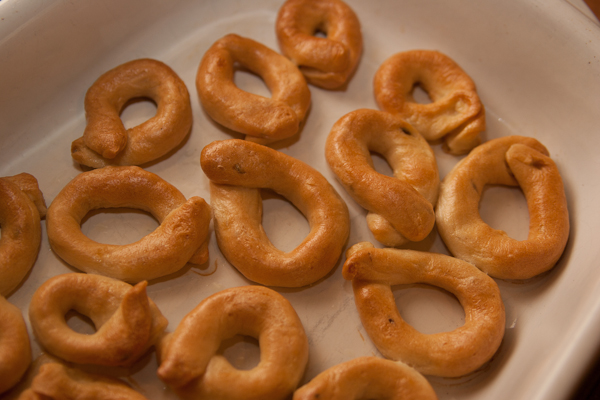
When all of the Taralli have been boiled put the tray into a medium oven, about 180C/350F for an hour. Check them now and then; if they are getting too dark reduce the heat a little. After an hour carefully prod a few to see if they’re cooked – they should all be hard and crispy.
If they are still soft cook a little longer. When done, eat one as soon as you can without getting burnt and let the rest cool down on a rack.
Store in an air tight jar or snap lock bag.
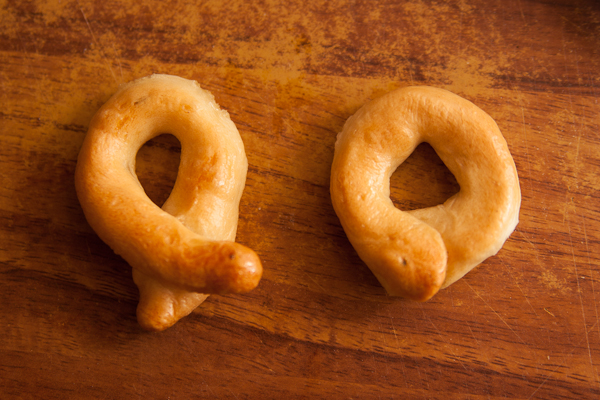
You may choose to have the ends cross over a bit. My missus says they look like a dog poo that way though.
Following from my post about making your own sourdough starter from scratch, here’s how to make a basic but delicious sourdough bread! There’s a lot of bread recipes on the internet and most of the serious ones will give ingredient weights. It is considered important to weigh ingredients because volume measurements for flour are very inaccurate – a cup of flour can weight more or less if it is humid or dry, densely packed or loosely packed, rye vs white vs wholemeal and so on. That said the more I bake the less I weigh ingredients. Once you learn what dough should feel like it’s pretty easy to start with about the right amounts, then adjust with a little more flour or water as needed. So here’s how I make a basic loaf of sourdough, without weighing. Depending on how active the starter is, a loaf can take a day or more to rise. In cold weather, leave it to rest in the warmest spot in the house (but not hot). For a stronger ‘sourdough’ flavour the dough can be left in the fridge overnight and taken out to rise the following day – the bacteria that give the sour flavour are still active in the cold while the yeasts that make dough rise are not.
Mixing
Pour 1/4 cup or so of active sourdough starter into a large mixing bowl. I use big plastic tubs which are large enough to knead the dough in, saves a lot of mess.
Glooop
Add 3.5 cups of flour (OK here’s one weight measurement – 3.5 cups of flour should weigh around 500g / 1lb which will make one standard sized loaf). I like to use a mixture of whole grain and white flours but you can use any flour: rye, wholemeal or white in different combinations.
Add 2 scant tsp salt and briefly mix the ingredients together .
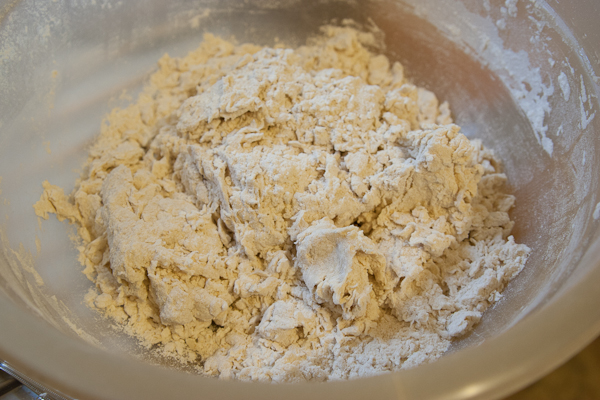
Now I add 1 cup of water. It’s pretty important to use filtered, spring or rain water when making sourdough as chlorinated tap water can stunt or kill friendly wild yeasts. I use a spoon (or a fork, for some reason I always like using a normal dinner fork for mixing dough) to stir the water into the flour mixture. It will probably look like a mix of rough clumps with some scattered crumbs at this point.
1 cup of water – not enough
Now I start adding just a 1/5 of a cup, or a few tablespoons of water at a time. After each addition of water I use my hands to fold and stir the clumps together. I pay attention to how the dough feels – it has enough water when it comes together in a single workable lump. Usually this is in the ballpark of 1.5 cups of water. The dough will be sticky on the outside and bits stick to my hands but I can feel that it has some substance when it is kneaded – it isn’t loose or runny. If I’ve added too much water, I knead in 1 tbsp flour at a time to bring it back.
1.2 cups water – getting there1.4 and a dash – just right
Once the the dough is a single lump, I cover it up and leave it alone for a while. Half an hour is enough, longer is fine too. This rest lets the water soak properly into the flour and the gluten will start to develop on its own, strengthening the dough.
Kneading
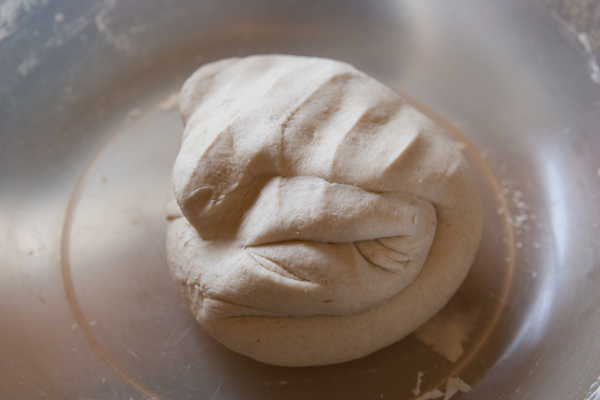
I knead the dough again by repeatedly folding it in half and squashing it flat. After its rest it should be much less sticky on the outside and should be knead-able without sticking to my hands. If it is still a little sticky I dust it with flour as I knead. After a minute or so of kneading it will be quite smooth – the outside will probably tear a little in places. At this point it can have a longer rest.
After a short rest and a quick knead
After some hours I knead the dough for another minute. Now it should be very smooth – depending on what flours where used it should make a smooth ball without any tearing.
After a longer rest and another knead – quite smooth now
At this point it needs to be left alone until it has risen noticeably – around 1.5 times bigger than it was when first kneaded.
Shaping
Once risen I gently shape the dough into a boulé (ball shape) by folding the dough in halves or quarters to make a squarish lump then stretching the outside of the dough around itself and pinching underneath – just like making a big pizza dough ball. Here’s a good video I found, although I treat sourdough a bit more gently than this if it has been slow to rise.
After folding into a lump, I use the edges of my hands to stretch the top of the dough around to the bottom, creating a tight ballThen flip it over and pinch the bottom shut
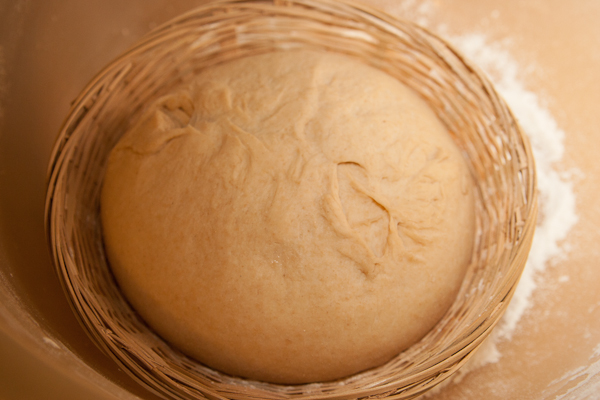
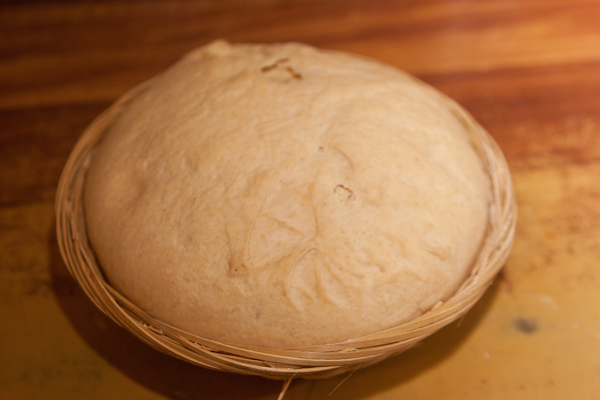
The shaped loaf is now left to rise again, often in a special proofing basket called a banneton. The basket helps the boulé hold its shape and lets the skin dry a little so it doesn’t stick. I use normal round cane baskets, sprinkled with flour but the boulé can just be left on a benchtop covered with a clean floured tea towel too.
Left to rise in a basket, which holds the ball shape. Sprinkle generously with flour and don’t wash the basket afterwards – it build up a nice coating of flour eventually.A couple of hours later, it had risen well
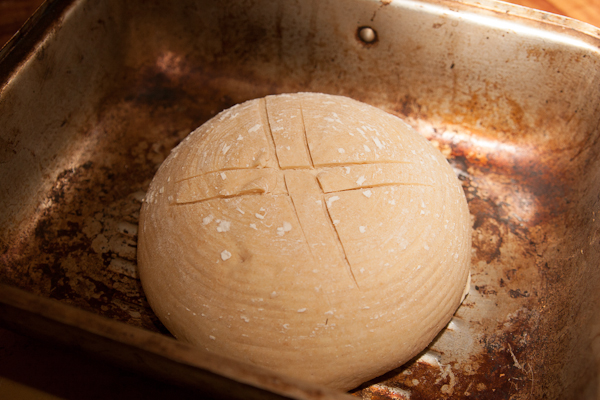
Just before baking I use a lamé – like a razor blade in a holder – to score the loaf on top – a finely serrated knife also works. Scoring helps the loaf expand as it cooks (and looks great too, it’s fun coming up with your signature score pattern).
This score pattern did not work that well, as you’ll see…
Baking
For best results bread should be baked in a moist environment. This stops the crust from hardening too quickly and lets the loaf grow more in the oven. To achieve this I bake in a large (and well used) metal roasting tray with a lid – the moisture in the dough is trapped inside the pan. Alternatives are any large casserole or dutch oven with a lid. Some people also use a tray of water in the oven but the sealed smaller container works better for me. If baked ‘naked’ in the oven loaves should be cooked directly on a preheated pizza stone. The loaf can be transferred to where it will cook by carefully picking up or by sliding on/off a floured pizza peel or chopping board.
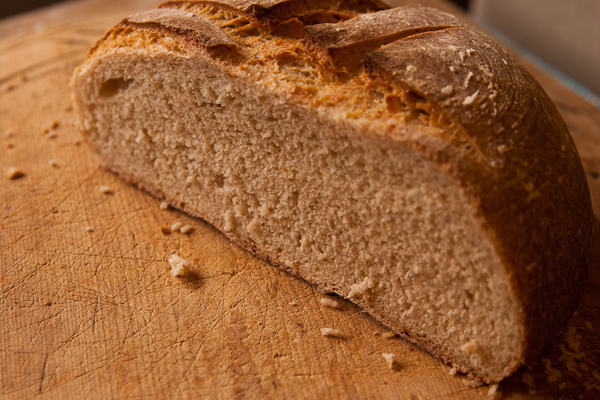
I cook at 230C/450F for 30 minutes with the lid on, then carefully remove the lid and bake for another 15-20 minutes or until cooked. The loaf is done when it’s nice and golden outside and sounds kind of hollow when tapped. I recommend getting a little probe thermometer though as this is the best way to know for sure – it’s properly cooked when it reaches 80C / 180F inside. Let it cool on a cake rack for a while before cutting.
A single + shaped score works better than the # I did here……but it tastes great regardless!
Here’s a few useful bread baking accessories & resources:
You can get pizza stones on Amazon but they break easily – if it’s going to be shipped around the world I suggest checking local kitchenware stores instead.
Almost all bread, pizza or other baked goods that are meant to be light and fluffy use yeast to raise or ‘leaven’ the bread. The easiest way to do this is to use a commercially packaged yeast but if you have the time there’s another method that offers even more complexity in flavour and texture – sourdough. Sourdough is dough that has been leavened using a portion of a sourdough ‘starter’ instead of a commercial yeast. The starter is just a dough of flour and water that has been allowed to start fermenting so that natural yeasts and other organisms multiply. The starter is ‘fed’ regularly with more flour and water.
Sourdough is very different to normal yeasted doughs in flavour and texture. Lactic acid bacteria produce a sharp tangy flavour, lending sourdough its name (although you can have more or less sourness depending on the balance of bacteria and yeasts in the starter). The consistency of sourdough may also be different, with some sourdough loaves having large irregular bubbles and a chewier consistency – although again this may vary based on the makeup of each starter. Sourdough also has health benefits – more claimed than I’m able to find hard evidence for but some very real. For example sourdough bread has a much lower glycaemic index (GI) value than regular yeasted white bread or even yeasted wholemeal bread! There is some research that shows sourdough breads have reduced levels of the gluten proteins that can’t be tolerated by celiacs. Sourdough also has less yeast than normal bread, important for people who are yeast-intolerant (although it does still have some yeast in the same family as the commercial varieties). Sourdough increases the bodies ability to absorb minerals in the grain by reducing phytate. So there are lots of good reasons to try making your own sourdough before you even consider that it is delicious.
How to make a sourdough starter
There’s lots of different ways of making a starter but the most basic method uses just flour and water. Organic flour is good, but plain unbleached flour works too. The water should be spring, rain or filtered water – most tap water contains chlorine, which will inhibit the microorganisms that want to flourish in the starter. Here’s how to do it:
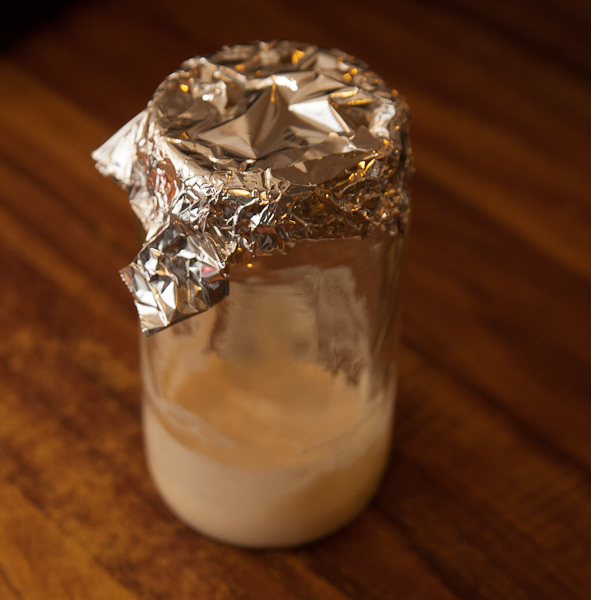
Clean a glass jar very well. Putting it through the dishwasher is a great way to kill any nasty bugs that are lurking.
Mix about 1/2 cup flour and 1/3 cup water water together in the jar. Cover with a piece of cloth or tin foil (not cling wrap, it needs to breathe) and leave in a warmish spot.
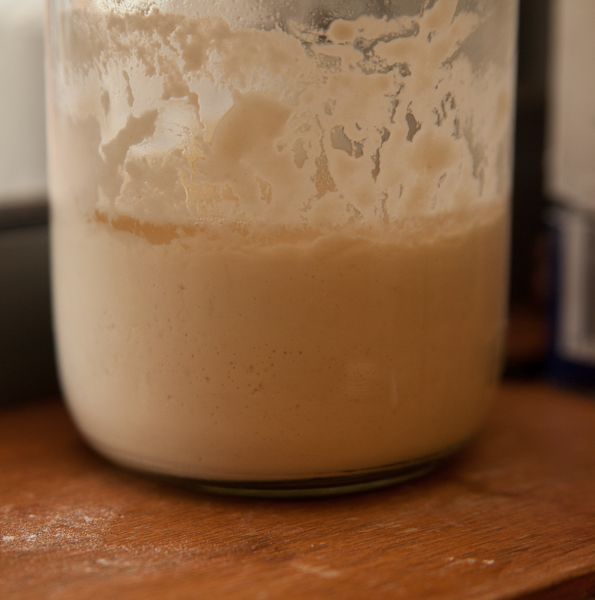
Each day for the next few days, mix in the same amount of flour and water again. If you have the chance, stir well a few times each day. After a few days, you should start to notice bubbles forming in the dough.
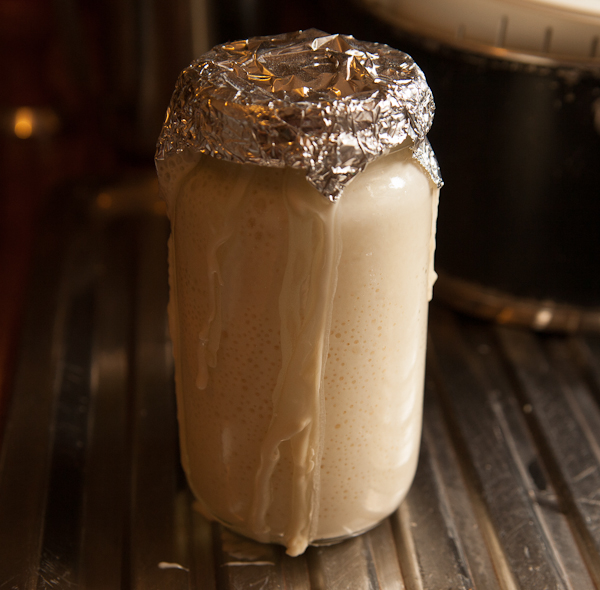
Once you have seen these bubbles form, it’s time to change the feeding schedule. Each day for the next few days, first remove half the starter – just tip it down the sink. Then replace with the same amount of flour and water. The goal is to feed the starter with fresh flour without increasing the volume so much that you run out of space in the jar. Eventually the mix will up to double in size in the jar after a feeding, so leave plenty of room.
After 7-10 days, the starter should be healthy and ready to use. It will have an interesting smell, and may have a sharp taste.
To make a dough, I just take a portion of the starter and mix it with the other ingredients. I replace the amount I took out of the starter with more flour and water. If making a lot of dough I will feed up the starter more than usual so there’s enough starter to go around. As a rule of thumb, 1/3 – 1/2 a cup of starter is about enough to make a loaf of bread. Any ‘normal’ recipe for bread, pizza dough, whatever, can be made by replacing yeast in the recipe with some sourdough starter, although it will generally be much slower to rise.
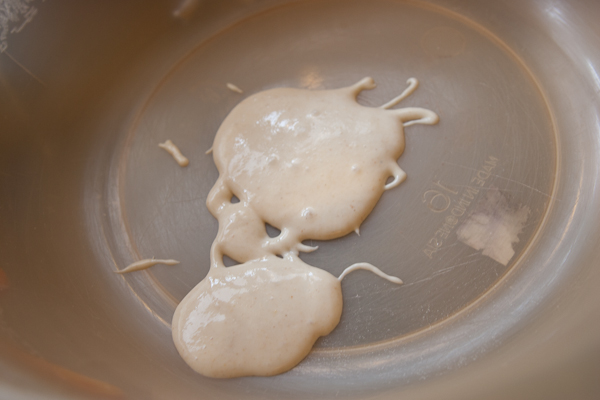
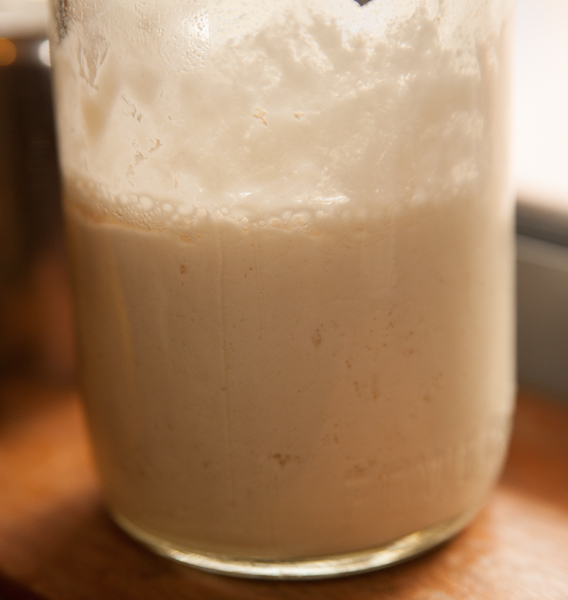
Day 0 – nuthin to see hereDay 2 – a little actionDay 3 – starting to see more bubbles. Yeasty smell.Day 5 – liftoff! That hasn’t happened before. Lots of bubbles, strong yeasty smell, tangy taste. You could start using it from here but the flavour will continue to develop over the weeks to come.
Storing the starter
If left at room temperature, a mature starter should be fed every 1-2 days. For bakers who don’t bake every day and don’t want to waste a lot of flour and water maintaining a starter it can be stored in the fridge for up to a week between feeds. If kept in the fridge it should be removed 24 hours before dough is to be made and given a feeding so that it is active.
What can go wrong
A sourdough starter is a living thing like any other pet. Some bakers have names or special pots or jars for their starter and even take it for walks! Like any living thing a starter can get sick. Here’s how to handle a few problems that might crop up without awkward phone calls to the vet.
Young starters
Depending on the type of yeast and bacteria in the kitchen, a starter might get an imbalance of the bad kind early on. If this happens you may observe the bubbles start, then slow down again. It will come good in time but Peter Rinehart suggests that you may have more luck starting again but using pineapple juice in place of water for the first 2-3 days – the extra acidity will create a less friendly environment for bad bacteria.
Old starters
If forgotten and left too long without food (how could you?), a starter can develop nasty off flavours like a strong funky cheese or even get a ring of mold in its jar. If this happens take a teaspoon of the starter, avoiding any moldy bits. Put it in a clean jar and restart the feeding process from the beginning, adding flour and water until bubbles appear. There should still be enough good yeast and bacteria from the old starter to get things moving quickly again.
Slow starters
If a starter seems very slow to work in a dough, it might be too acidic. Try feeding with more flour and water than usual or discarding more of the starter than usual before feeding. Feed twice in this way before using again. Make sure the water used is free of chlorine. Keeping the dough in a warm place to rise will also help.
Brown liquid on top
Just pour it off.
Cheating
Sometimes my sourdough loaves just don’t rise right. This is part of the fun and with experience you can work around the quirks of your own starter. But if I really want to bake that day I sometimes give in and add some instant dry yeast to the dough to give it an extra kick. It should be dissolved in 1 tbsp water, then kneaded well into the sourdough which should now raise more quickly.
Buying a sourdough starter
If making a starter from scratch isn’t for you, or you just can’t get it to work, plenty of stores sell a packaged version of the same yeasts and bacteria which you can use to reliably get a starter going. This one is 6 bucks on Amazon.
I couldn’t wait to try my new starter any longer so I whipped up a loaf. One of my next posts will be about my basic process to make sourdough bread and pizza crusts.