Skip the bla bla – just take me to the recipe!
It’s always a good idea to use the best ingredients you can get your hands on, but for pizza dough, the most important ingredient is free – time! When dough is left to rest or ‘age’ for long enough the difference in flavour compared to a standard dough is incredible. The cooked base has a sweet, nutty/buttery flavour, so good that you’d be happy to eat it with no toppings at all. In this recipe, we start by making a simple dough and then leaving it to rest in the fridge overnight or up to a few days. It sounds a little complicated but the besides the great taste, the benefit is having dough ready to go at a moments notice – you can just pull your premade dough out of the fridge and start making pizza!
For those interested in the science, the flavour develops in this way because enzymes in the flour start to break down the starch molecules, converting them to complex sugars. These sugars give the dough a natural sweetness and help the crust caramelise to a golden brown when cooked. Incidentally, this is why there is no sugar in this dough – when other recipes call for added sugar they are looking for the effect that we get by just leaving the dough be. The dough is kept in the fridge because the low temperatures slow down the activity of the yeast, preventing the dough from raising so much that it collapses. The low temperatures also keep the yeast from consuming all of the sugars in the dough! It is a complex topic – if you would like to read more about this, author and baker Peter Reinhart has a lot of excellent, detailed information in his book The Bread Baker’s Apprentice. Peter also has a great blog about his books for those interested in bread and other baking.
There is one other benefit from the overnight rest, which is less need to knead. In a standard recipe the dough must be kneaded for up to 10 minutes to develop the gluten, which gives the dough strength and allows it to be shaped without tearing. But when dough is left to rest for longer, the gluten starts to develop on its own and just a short period of kneading is enough to shape a useable dough. The reduced handling improves flavour and colour by reducing oxidation (caused by increased exposure to air ).
HOWEVER – you don’t have to know any of this to make the dough, so let’s jump in and get started!
This recipe makes enough dough for 2 medium-thin crust pizzas. You can scale up the quantities to make as many or few as you like. It’s important to use good quality flour, but you can experiment with different brands to find one that works for you. Look for an unbleached flour with around 11% protein and you can’t go wrong, although you may have to use a tiny bit more or less water as every flour absorbs water a little differently. If you can find a good one, the traditional flour used in Italian pizza is ’00’ grade flour. 00 flour is a little finer than normal flour, and the texture and flavour is wonderful.
It’s important to weigh the ingredients when making dough, and weights are given here in grams. Kitchen scales that measure grams are ok for the yeast and salt if you don’t mind guesstimating a bit, but scales that measure fractions of a gram are a nice luxury as well. However, I have given approximate measurements in volume for those who don’t have scales.
Ingredients
- 300gm White flour (2 1/4 cups)
- 200ml Water (4/5 of a cup)
- 6g Sea salt (1 heaped tsp)
- 3 g Instant dried yeast (1 slightly heaped tsp)
- 15ml Olive oil (1 tbsp)*
*The olive oil is not truly traditional but it is added here to make the base more tender. If making this dough for a wood fired oven, you can omit the oil as the faster cooking time in a WFO gives a tender base without it.
Method
- Mix the flour, yeast and salt together in a large mixing bowl.
- Add 3/4 of the water and stir with a spoon. Slowly add as much of the rest of the water is needed for the mixture to form a rough lump. If there are stray crumbs of flour left in the bottom of the bowl, add a little more water half a tablespoon at a time and continue mixing.

- Pour the olive oil over the dough.
- Cover the bowl with a clean tea towel and leave to stand for 10 minutes.
- Sprinkle some flour on a large board or clean bench top, and turn out the dough. Sprinkle a little flour over the top, just enough to make it easy to handle without sticking to your hands.

- Knead the dough for 8-10 strokes, just until the olive oil is mixed in and the dough feels silky and smooth.
- Put the dough back in your mixing bowl, cover, and leave to rest for another 10 minutes.
- The dough is now ready to divide into pieces. This recipe makes 2 x 250g pizza bases, so use your scales to make 2 even lumps.

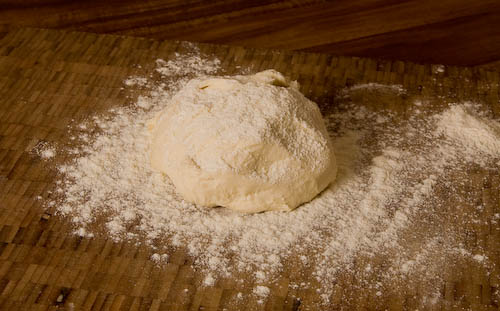
- Shape each piece into a dough ball, roll each ball in flour to coat well, and put them in the fridge overnight or for at least 6-8 hours. You can put them in a baking tray or plate covered loosely with glad wrap, or a large sealable plastic container. Make sure you leave room for the balls to expand – they may grow up to double in size while in the fridge.

- Remove the dough balls from the fridge about 1 hour before you want to start cooking, around the same time you start preheating your pizza stone in the oven. Once the oven is ready, shape your base, add toppings of your choice, and use your peel to slide the pizza into the oven! A thin crust pizza cooked in a properly preheated oven should be browned and bubbling in 5-7 minutes.


I followed this recipe. Not too hard to do, and certainly convenient to have the dough ready in my fridge.
I make homemade pizza fairly regularly – complete with dough. But am not quite satisfied with it sometimes – always looking to improve. I think I shall just have to try your recipe and techniques here. Thank you!!
Recipe calls for too much water. Also, recipe doesn’t result in enough dough for two pizzas – this makes enough for one large (16in) pizza.
Hey Dave, thanks for the comments. The amount of water used in a recipe depends very much on the flour you use. Flours with higher protein content will generally require more water. I use this amount of water or more in a flour around 12% protein.
Having said that, with pizza dough the wetter you make the dough the better. It’s a fine balance between making it too wet to handle, and too dry to be light, fluffy and chewy! Hope your pizzas were nice anyway.
Hello, is it OK to freeze this pizze dough?
Sure is! Follow the recipe up until the start of step 10, but instead of taking the dough out of the fridge to warm up, pop it straight in the freezer wrapped in plastic wrap or in a zip lock bag. These should keep for up to a few months. Allow to thaw in the fridge before re-use.
Hi!
Do you think it’s possible to use Whole Wheat pastry flour in this recipe? Or Whole wheat flour?
Thanks!
I would avoid the pastry flour if possible, as when we make pizza bases we want something that can be stretched into shape without tearing. Pastry flour is lower in gluten than other flours, so may not stretch as well. However whole wheat flour will make a lovely pizza dough, with a heavier texture and flavour. You will need to use more water than with white flour though, play it by ear and add slowly until it feels right.
You can also use a blend of whole wheat and white flour, still healthier than white flour on its own but gives you a little more lightness and workability in the dough.
Consider the toppings you use too, I find that stronger flavours can work well with whole wheat bases.
For a stretchy dough that won’t tare easy I would suggest using 00 flour.
We use Antimo Caputo. Use a dough docker in the area where you will add your toppings but not the crust area.
It will give you a wonderful thin crust in the topping area and the crust area will puff quite nicely.
I don’t like to dock my base at all – let it puff and bubble!
Hi, I have been making home made Pizza for about a year now, I am always looking for different dough recipe’s. can you answer this question please.
Why do some people mix the yeast to the warm water first, & wait for it to act?
Why do some people mix the dry yeast to the flour & other dry ingred. & then add the water?
Thanks.
Brian from Dublin Ireland.
Hi Brian,
I think some of the confusion comes from the fact that there are 3 different commercially available types of yeast. Compressed yeast is fresh, moist yeast that comes in a block. According to Paula Figoni in How Baking Works this should be dissolved in warm water before use.
Active dry yeast is not as common but should also be dissolved in warm water before use.
Instant yeast (which I use for all my baking except for sourdough) is effective when added directly to the dough without being mixed with water first and should be used this way for best effect.
The common explanation you see offered when someone advises ‘proofing’ the yeast by mixing with water and sugar before use is that if it starts bubbling, you know it is active. I think as long as you buy instant yeast that has been stored properly, and don’t use it far beyond its use-by date, you have no reason to mix with water before use.
Any recommendations for high altitude baking of pizza dough?
Hi Katie, what problems are you having? Although I haven’t ever had to bake a pizza at high altitude, Harold McGee in ‘On Food & Cooking’ says in general recipes should be adjusted by:
-Using a little more moisture
-reducing fat & sugar
– Cooking hot
Since a good pizza dough is already quite moist, has no fat or sugar and is cooked as hot as possible it should usually perform pretty well based on that!
Hi, I was wondering how important is the 6-8 hour thing? What happens if you are to leave in for maybe 4-5 hours? Will that ruin it entirely?
I think 4-5 hours would be fine – I might recommend just kneading it for a minute longer if you don’t have time to leave it in the fridge for quite as long. Alternatively, check out my quick dough recipe here: http://www.liveforpizza.com/2009/06/quick-pizza-dough-recipe/
I use yeast, 5 cups of flour, 1 3/4 cups of water, 1 tbs of oil, 1 ts of salt. I mix my yeast with 1/4 cup (of the 1 3/4 cup of water) of hot water to activate (about 10 min.) the yeast. Then mix the remaining. Knead by hand for 8 min or 2 1/2 min with kitchen aid mixer on 2 speed with dough hook. Then I leave the dough out for 1 1/2 to 2 days (punching down 1/2 way through) before use. I do NOT put the dough in the fridge, it stays in the warming drawer on proof. Make sure the dough and bowl are coated with oil so the dough skin of the dough does not dry. Try it and you will like it.
Hi Don, thanks for the feedback. I’ve done some more weighing myself and adjusted the cups of flour in my recipe to match the weights more closely!